About Me

I have been cooking my way through life for over 50 years, beginning with mud pies as a child. I've turned a corner now and feel a Renaissance in my life. Recipes and Random Thoughts is my personal spin in a blog about how to prepare good food and how it prepares you for life. I want to share with you, honest to goodness food punctuated with perspective from the special memories and moments that have marked my journey.
Showing posts with label Desserts. Show all posts

Friday, April 10, 2020

Lemon Posset

Spring is the perfect time for the lucious English classic lemon dessert with clear citrus flavors. This is about as easy to make as it gets.  Only four ingredients and little active time.

2 cups heavy cream
2/3 cup sugar
1 tbls grated lemon zest
6 tbls lemon juice

In a medium sauce pan combine the cream, sugar and zest.  Heat over medium and stir to combine and occasionally as it cooks.  Bring to a gentle boil ( do not let it boil over) and reduce to exactly 2 cups.  If it starts to boil over remove from heat briefly. Cooking time 8-12 minutes.  Off heat, stir in the lemon juice.  Allow to cool 20 minutes.  A skin should form.  Strain through a fine mesh strainer to a measuring cup and discard the zest. Pour equal amounts into 6 ramekins, then chill at least 3 hours.  Let sit at room temperature 10 minutes before serving.  Garnish with fresh berries.

Tuesday, December 31, 2019

Reviving the Syllabub Dessert

Elegant syllabub
What a fabulous, frothy finish to our Christmas Eve meal!  Syllabub is the perfect balance of rich yet light.  Why has it been hiding in the attic so long? Dust this recipe off and rediscover a delightful treat. It made me think of eggnog as tiny champagne bubbles.  I remember my mother mentioning it as a American Colonial dessert but it really has its' roots in England, all the way back to the 16th century.

Several years ago, I went to a holiday party and syllabub was dessert.  I was wowed and interested the hosts were using a unique contraption to achieve the frothy consistency.  I finally got around to asking the details and my friend gladly shared her simple recipe and her antique syllabub pump.  It's so easy and delicious, I can't imagine why it isn't as popular as ice cream.  I noted  culinary authors, the Lee Brothers, share the same sentiment in their Charleston Kitchen cookbook.  That version is similar to James Beard's, which is a hand whipped item.  I guess they couldn't get their hands on one of these pumps.  They are only available as antiques and quite rare.  My friend's pump had been passed down through her family.


Syllabub pump
A bubbly drink of wine and milk became the word "syllabub".  Compounded from the words, Sille, a region in the Champagne area of France and the English slang word " bub", meaning a bubbly drink.  There are various versions,  commonly, using sherry and lemon peel, but this is the Deep South version and we prefer it made with Bourbon.  End of discussion.

Now the bigger problem is the tin pump.  They just don't exist anymore and I feel privileged to have been able to make Syllabub with a family heirloom.  It makes the dessert much more etherial.  Small pin size holes in the bottom of the pump express air through the mixture. Using a whisk is fine if that's all that's available but the results will be more whipped cream like, still a delightful creation.  I'm looking for a crafty person to make one. See the picture  and let me know if you have a source.

It's just 4 ingredients :

1 quart heavy cream
1 pint whole milk
1 cup sugar
1/2 cup bourbon

Mix until sugar dissolves then chill overnight.  Mixture must be very cold.  Stir before you begin to pump to insure the ingredients haven't settled.  Submerge pump and pump like mad (or whisk by hand).  Skim off the foam and serve in a compote with a spoon.  Serves a lot.

Sunday, November 17, 2019

Pursuing the Perfect Pie Crust

spinach quiche
 The "perfect" pie crust that rolls out like a "dream", light, tender with a flaky bottom crust  is achievable with practice and attention to detail.  I don't make too many pies and never really settled on a single recipe until my cousin called and asked me to help her master her late mother-in-law's pie crust in time for Thanksgiving.  She had departed this world leaving behind two treasures; a sketch of a recipe and a well laminated pastry cloth.  When I heard that, I knew we were talking about a pie saint with a sacred recipe. She had baked each son's favorite pie for Thanksgiving with skillful ease and my cousin wanted to honor the tradition.  What I noticed as I dove in and reviewed the varieties I'd made before that included variables like egg, shortening, cream cheese and even vodka, was that they're leaving out a lot in the recipes and videos.  "Roll the dough out on a floured surface" is culinary malpractice.  That's like telling a passenger to land the plane at night.  Just look for the runway lights. Where's the instruction manual?
Double crust pie

More important than the ingredient mix is technique.  I've used a food processor to mix the dough before but realized that's for sissies.  Roll up those sleeves and use your hands.  Larger pieces of fat distributed throughout the dough still accomplish coating the flour with fat so not too much water is absorbed which makes for a sticky dough.  No matter the recipe, all ingredients and even the bowl need to be COLD and the dough throughly chilled before and after placing in the pie plate or tin.  It's a race of time vs temperature to cut, mix, knead and roll the dough before the fat becomes too warm.  According to the pastry goddess, Stella Parks, that perfect temperature is 68 degrees.  Any higher, and its back in the refrigerator for a chill down.  So keep an instant thermometer handy.

Rolling out the dough is tricky.  Here are some helpful tips;
  • pat the dough into a disc 5 inches in diameter.  That's about 15 oz per disc minimizing any fissures to the disc surface by smoothing the surface and edges.  A fissure will only enlarge with rolling and distort the circle.  
  • Pinch any cracks together with a moisten finger and dust with flour.  Wrap in plastic wrap. The plastic allows you to smooth edges without drag. Chill for at least 2 hrs before rolling out
  • unwrap and roll on a floured surface from the center to the edge making a quarter turn after each roll.  The dough should always slide and not stick on the floured work surface.
  • flip the dough over after you have completed 4 turns dusting the surfaces lightly with more flour and brushing away any excess on the dough surface.
  • use pyrex or quality pie tin for best results
  • for a nine inch pie plate, the rolled dough should measure 12+ inches in diameter
  • use a finger dipped in water to moisten any cracks and smooth. Dust again with flour 
  • a floured rolling pin sock discourages sticking to the pin
  • if at any time the dough gets too soft - back in the refrigerator for 10 minutes
  • either roll the dough over the rolling pin and into the pie plate or fold in quarters, center in the pie plate and unfold. Whatever works best for you.
  • adjust the dough so it falls naturally into the pie plate, never stretching the dough, making sure it fits into the bottom corners of the plate.
  • The dough should hang 1 1/4 inch over the edge. Trim to 1/2 inch and tuck under onto the top of the pie plate not inside the plate.  Crimp or flute as desired.
  • chill the crust again once the dough is fitted into the plate for single crust pies
  • to partially bake a crust, line with aluminum foil and fill with 2 pounds of dried beans or pie weights.  This will keep the crust from puffing and the dough from shrinking or sliding down the sides.  Remove the weighting and continue to bake as directed for a pre baked crust.  
  • pricking the crust is not necessary if pre-baking with pie weights.
  • bake on a preheated pizza stone
  • use bleached Gold Medal all purpose flour, it has a lower ph
flakey bottom crust

Now, for the recipe; all butter or a butter/shortening mix (lard if you can get it).  The hallmark of a good pie crust, for me, is a flaky bottom crust no matter the filling and both versions will deliver.  All butter is sturdy and has better flavor but butter/shortening has better texture.  For an all butter version, search Stella Park's All Butter Pie Crust.  It is brilliant, "easy" and intentionally cultivates gluten for a sturdy dough if you are making a lattice crust or tart shells.  Her method of folding and rolling the dough is as important as the recipe and worth watching her video.

2 Crust Butter/Shortening Pastry

2 cups or 275 grams all purpose flour
1 1/4 cups or 175 grams pastry or cake flour
1 tbls or 22 grams sugar
1 tsp or 2 grams salt
a pinch of baking powder *helps the crust expand for flakiness*
Apple pie sliced
14 tbls  or 200 grams unsalted American style butter
6 tbls or 72 grams shortening
1/4 cup ice water or 52 grams (add 1 or 2 tablespoons more if needed)
1 tbls white vinegar or 18 grams*this shortens the gluten strands*

Combine the flours, baking powder, salt and sugar in a medium bowl and whisk together 
Cut the butter and shortening into 1/2 inch cubes. Add to flour mixture and toss to coast each with flour.  Roughly smash each cube to flatten with your fingers.  Add the water and vinegar knead quickly to a shaggy mass then turn onto a floured work surface.  Continue to knead the dough until a cohesive mass forms.  Work quickly, handling the dough as little as possible. It should take no more than 1 1/2  to 2 minutes. Divide in two, form into discs and wrap in plastic.  Chill for at least two hours before rolling out.  See notes above.
If refrigerated overnight, set out for 10 minutes at room temperature before rolling.  Lasts in freezer 3 months.

A disclaimer: The above recipe is based on Chef Thomas Keller's ordinal in grams.  The weight conversion to Imperial is close.  I encourage all cooks to buy a digital scale for accurate baking.


Monday, September 2, 2019

Caramel Cake - Some Tips. It Takes Practice and Patience

Not perfect, but not bad
A first class caramel cake takes a great recipe, patience and practice.  I mastered caramel some time ago as a sauce or candy and cheated at icing by just adding powdered sugar to it.  My son's birthday is up so I decided it was time to roll up my sleeves, put on my big girl panties and make a real cooked caramel icing cake.  Caramel icing is something even the most accomplished cooks will tell you is a challenging feat.  It's about timing, temperature and technique plus good equipment.

 I've been looking at caramel cake recipes for years and never taking too many of them seriously.  I had in mind one I tasted years ago made by a lovely lady from Willacoochee, Georgia.  She passed away recently at 97 without making her secrets known.  Her cake was tender and moist and the icing was creamy, caramel sweetness perfection that clung to the cake in smooth elegance without any torn cake or visible crumbs .  I finally settled on trying the recipe in the Lee Bros. Charleston Kitchen cookbook (page 223) .  I focused so hard on the recipe and specific temperatures to cook and cool the caramel to, I didn't take too seriously how challenging icing the cake might be and there lies the technical issues and the art.  So here are some tips to make that cake survive.

Icing the cake on a cooling rack over a waxed paper covered baking sheet allows the slightly warm icing to flow over the cake layers and drool down onto the waxed paper.  It can be scraped up and reused as necessary with a little warm water whipped in.  After seating the second layer on top I began to realize the top layer was sliding off.  You can't just ease it back into place without the icing pulling away from the cake.  I started to panic but tilted the layers and the cake slid back to alignment.  This cake required on the spot thinking and that most don't.  Never had to do that before. More drooling icing over the top made it clear, you don't smooth this icing with a spatula or anything more than a finger dipped in warm water.  Any bumps generally relax to a smooth finish. It's very tricky business, so this is fair warning.  Make those layer even and don't do anything to pull the icing away from the cake.  Fix mistakes or smooth with a finger dipped in warm water.  Scrape up and reuse icing with a teaspoon of hot water beaten in.

When the icing has set, moving the cake from the rack to a pedestal is even trickier. Use two spatulas on each side in line with the top wiring on the racks grid. Shove them under the cake with conviction.  Once you there, it's no turning back.  Now lift, and move it quickly.  Don't try to pull them back out from under the cake until it's in place.

A cooked caramel cake is an art just as much as a fancy wedding cake or butter cream icing - this one just tastes the best to me.

Tuesday, November 20, 2018

Every Grandmother Should Know How to Make "Wanilla" Cake with "Camel" Icing

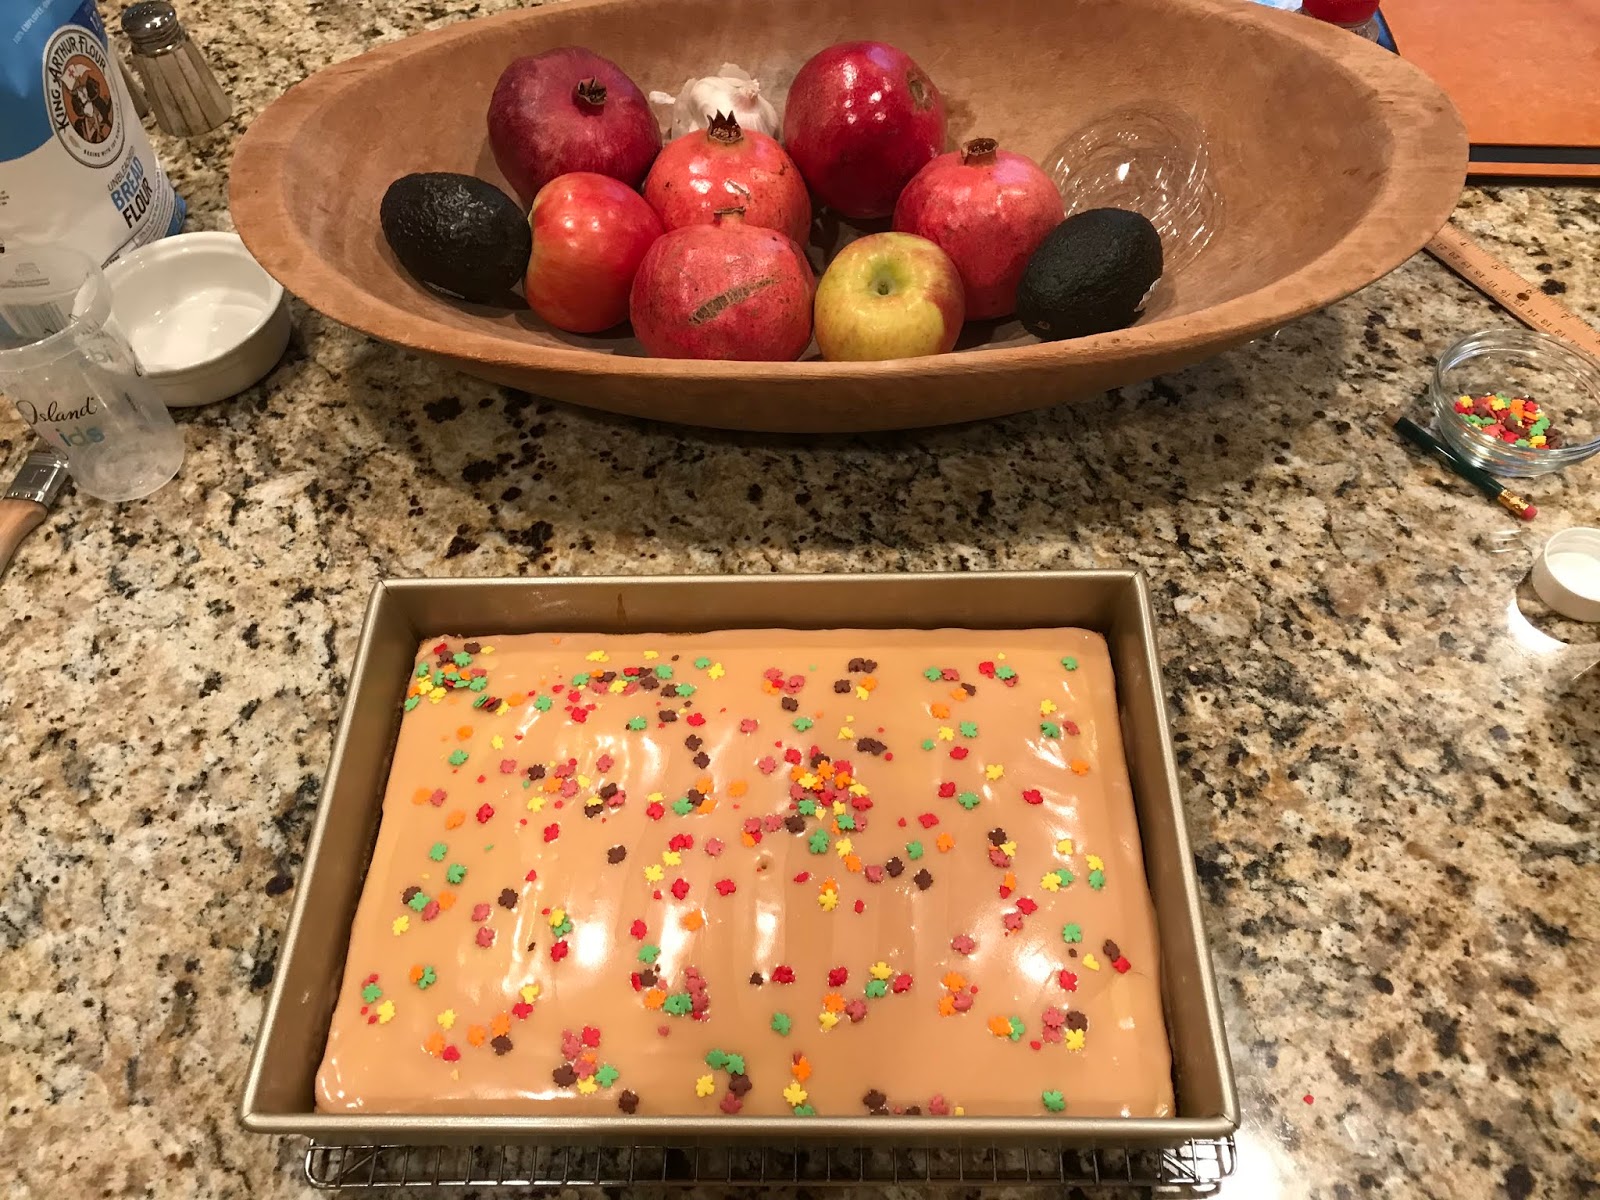
A small voice behind me asked, "Can we make wanilla cake with camel icing?"  Usually, he only asks for a peanut butter and jelly sandwich.  I only hesitated a second as I quickly calculated the ingredients I had on hand.  "Yes", I replied, never wanting to discourage anyone from cooking.  My pantry is deep into the basics so I knew I could come up with ingredients that would make his "wanilla" preference. I asked if he might want to try a chocolate icing but he was adamant, he wanted "camel".  Me too, it runs in the genes.  I just happened to have a jar of my caramel sauce in the refrigerator and knew when warmed and blended with some powdered sugar it would make perfectly good icing.  I fashioned a little apron for him and let him stand on a step ladder.

I pulled out my big standing mixer, assembled the ingredients and let him help measure and pour.  No   box mixes for this granny.  I'm scratch all the way.  What a joy!  Can you remember making a cake with your mother or grandmother?  I can.  I remember it was a Betty Crocker box mix of "pink lemonade" flavor.  I was about the same age when my mother let me stir and lick the spoon and with that, the fire was lit.  I know he's made cup cakes and pizza with his mother so this request wasn't without some prior experience.

I let him pick from my selection of sprinkles and he really got into the decoration part.  He asked me, as he worked hard at scraping all the batter up, if I had gone to school to learn to make cakes.  I said, no, but there where cooking schools that taught all sorts of things. He said he might like to go someday.  Hmm, maybe we lit a little spark here.

If you have a small child around who wants to bake a cake, be ready!  It just flour, eggs, butter, milk, salt, a little "wanilla" and a big dash of love.  The reward is priceless.

Sunday, July 24, 2016

Silver Queen Corn Ice Cream

I made them guess what the secret ingredient was and they didn't even come close.  Coconut and cake was all they could come up with but no one ever thought of sweet Silver Queen Corn as an ingredient for ice cream.  I'd heard of it before and thought it would go swell with my peach - blueberry cobbler.  It's summer and all I'm making use of the best offered this season in delicious recipes.

I've enjoyed corn this summer in a number of ways; grilled, stewed, sautéed but the sweetness of the Silver Queen variety lends itself to a special twist of vanilla ice cream.  I noticed a recipe for sweet corn ice cream in Garden & Gun Magazine which peeked my interest but I wasn't satisfied and a little more research led me to a wonderful custard based version from Spoon, Fork, Bacon.  I think this is truly worthy of the effort and time it takes.  Remember the key to this smooth, sweet summer treat is really sweet corn and patiently straining the ingredients and custard (twice). Get ready for a memorable summer treat.

1 cup Silver Queen Corn cut from about 3-4 ears, reserve any milk and cobs
2 cups heavy cream
1 cup whole milk
1 cup superfine sugar (Castor) divided
6 egg yolks
1/2 tsp salt
1 tsp vanilla

Combine corn, cobs, milk, cream and half of the sugar in a heavy bottomed sauce pan.  Simmer 5 minutes util sugar is dissolved.  Cover and turn off heat and let steep for one hour.  Remove the cobs and discard.  Pour the corn mixture into a blender and puree until smooth.
Strain through a double fine mesh strainer, pressing as much of the liquid through as possible.  Pour the mixture back into the sauce pan.

In a separate bowl combine the egg yolks with the remaining sugar and salt, beat with a whisk until light and fluffy.  Temper the eggs with one cup of the liquid mixture and beat vigorously to keep yolks from scrambling.  Add the egg mixture to the sauce pan and the corn mixture.  Heat over medium low, stirring and cook until the custard coats the back of the spoon.  Stir in the vanilla and stain through fine mesh lined with cheese cloth. Squeeze the cloth pressing as much of the custard through as possible.  Chill over night and then freeze in an ice cream maker according to the manufacturer's directions.  Makes about 2 quarts.


Monday, May 25, 2015

Summer Strawberry Cake

Memorial Day weekend signals the beginning of summer.  Everyone has shed their coat and tie for shorts and T-shirts, stilettos for flip flops and headed for the beach or lake in droves. We're ready for relaxed, easy entertaining and menus. Things that don't take much time and effort but make that "summer is here" statement.  This delightful and simple strawberry cake fits the bill.  It's modestly adapted from Martha Stewart and Jenn Segal's version.

1 1/2 cups all purpose flour
11/2 tsp baking powder
1/2 tsp table salt
6 oz softened butter, plus more for buttering pie plate
1 cup sugar, plus 2 tbls divided
1 egg
1/2 cup whole milk
1 tsp vanilla
3/4 pound strawberries, washed, stemmed and halved

Preheat oven to 350 and butter a 9 inch deep dish pie plate or cake pan (round or square).

Mix the first three ingredients in a medium bowl.  In a mixing bowl, beat the butter and sugar together until light and fluffy.  Add the egg and beat to incorporate. Add the flour mixture and liquids alternately in three portions and beat until smooth.  The batter will be fairly thick.

Pour into greased pie plate and top with halved strawberries. Don't press the berries down in the batter.  Sprinkle 2 tbls sugar over the berries and batter to form a crisp topping while baking.

Bake at 350 for 10 minutes, then reduce heat to 325 and continue baking for 50 minutes or when the top is browned and a tooth pick inserted in the middle comes out clean.  Cool in the pie plate and serve with whipped cream or ice cream. Serves 6-8.

Wednesday, November 26, 2014

Holiday Rum Cake

I don't have to do much cooking for Thanksgiving. It's a "bring a dish" gathering with our family but when my son and daughter-in-law arrive late tonight, I like to have something for them.  I prepare 'do ahead' grazing recipes for feeding impulses and the extra pounds that come with those impulses.  I'm cooking a turkey breast for sandwiches and making a big pot of Pasta Fagoli soup (see Jan 2012 post) as a light but comforting 'welcome home" meal.  I settled on Rum Cake for dessert.  A patient of my husband used to give his office a rum cake every year that was divine.  I love anything with rum in it. It's the sort of cake that can sit under the cake stand dome and beckon you any time with it's moist rummy flavor.

Now for the awful truth.  It's the recipe that is made with yellow cake mix and Jello pudding mix.  I thought about a scratch version but knew it would never quite match the classic posted so many times on the internet.  If it ain't broke don't fix it.  I had some caramel sauce in my refrigerator and added half a cup on rum to make the glaze (see Caramel Confidence, Oct. 19, 2014).

Preheat oven to 350 degrees.  Grease and flour a 10 inch bundt pan and set aside.

4 eggs beaten
1/2 cup canola oil
1/2 cup water
1/2 cup dark rum

Mix these ingredients with and electric mixer until well blended.
Add:

1 box 18.5oz box of yellow cake mix
1 oz box Jello vanilla pudding mix

Pour into prepared bundt pan and bake for 45 minutes.  Remove from oven and poke hole with a skewer over the surface.  Pour 1/2 cup of caramel  rum glaze over the warm cake.  Turn out onto cooling rack with parchment or something to catch the excess glaze.  Poke holes over the top and pour the remaining 1/2 cup over the top. Garnish with toasted pecans or walnuts.

Sunday, October 19, 2014

Tips for Caramel Confidence

dry method with butter & cream
Caramel is sugar cooked to a temperature where it breaks down to its components glucose and fructose and then dairy ingredients added, most often, cream and butter, then flavorings (vanilla and salt).  Cooked sugar can take the form of brittle, icing, sauce, or candy, to name the most familiar. I've already published a caramel sauce recipe(Sept. 15 2014-Apple Walnut Cake with Caramel Sauce) and frankly, any form of caramel takes practice, so these are some tips that will give you confidence when cooking sugar.  I usually get it right 99% of the time but there's that occasional moment  of distraction or something in the chemistry  that turns my favorite dessert sauce to a burned, lumpy nasty mess in a second.  There are some basics of cooked sugar that should lessen your chance of disaster when attempting a caramel of any style.  No matter how you make your caramel, it will add a fabulous complexity of flavor to any dish.

There a two methods for making caramel: wet and dry.  The dry method is simply heating sugar in a dry pan until the sugar liquefies and browns.  This requires careful attention to heat and color without a candy thermometer.  Use a wide surface heavy fry pan for this method so the sugar is distributed in a thin even layer. This encourages more even browning.  The technique for moving the melting sugar may be swirling the fry pan and never stirring or stirring the sugar a little in the beginning to get the flow going but after that point a stirring device will cause crystallization to form around the spoon so swirling is desirable as soon as the sugar starts to liquefy. Add, butter, cream and flavoring (salt & vanilla) once the sugar liquefies and you have a caramel sauce.  The finished, cooled sauce should be smooth and thick enough to fall in a ribbon from a spoon.  It will thicken more as it cools.

perfect dry method caramel sauce
The wet method adds a little water to sugar,  then boils the mixture to a certain temperature.  Using a heavy, wide sauce pan you must always be on guard to keep any crystals from forming on the side of the pan because it can cause a chain reaction and turn the clear syrup to opaque and grainy.  The wet method is a little more forgiving as the water slows the heating and there are various techniques to avoiding crystallization. Washing down the sides of the pan with a damp pastry brush or covering the pot with a lid to trap steam will dissolve those crystals.  Don't stir the syrup until it starts to show color.  This is an indication 80% of the water has evaporated.  Use a candy thermometer for accuracy and keep a bowl of cold water handy to cool the temperature down when you see the right color.  Submerge the bottom of the pan for a quick cooling method.

wet method cooking with a thermometer

Know what temperature you need.  Caramelization begins around 320 degrees when the sugar melts.  At 340-350 degrees, the color progresses to medium brown and, when cooled, will still be hard but not brittle.  At 365-380 the caramel is dark brown and will cool to a softer texture.  This is where to add cream and butter, etc. to make sauces or candy.  Anything above 410 degrees is "black caramel"  typically only used by professional bakers.

I prefer the dry method for sauces and in making caramel. For this post both techniques did develop a few lump which I just strained out with a gravy stainer.  Lowering the temperature will usually help them dissolve. Any recipe could dictate which method you need but it is the dedicated home cook who can master both, so give both some effort.  Your friends and family will be impressed.

Beware of molten sugar.  It's hotter than boiling water and can adhere to the skin and cause serious burns!!  Don't taste until it cools.

Wednesday, September 10, 2014

Fig & Almond Tart

Practice makes perfect and I'm not perfect yet with my Pate Sucr`ee.  Today, I took advantage of fig season for another round of pastry homework and made a beautiful tart.  Pastry dough takes practice and I'm excited to try all sorts of wonderful fruits of the summer with this marvelous crust. I've already made a peach raspberry pie and today the fig tart.  I'm in love with the fig and almond combination.  This tart has the "Wow" factor as a dessert. So roll up your sleeves and roll out some more pastry.  The rest is easy. It doesn't hurt for the figs to be firm.

For the Pastry:

1- 5 inch disc of chilled pate sucr`ee (see blog post 9/5/2014)

Roll out to 1/8 inch, roll up on a rolling pin and apply to a 10 inch  remove able bottom tart pan and prick the bottom with a fork(docking). Chill in the refrigerator for 30 minutes. Line the tart shell with parchment paper and fill with pie weights or dried beans, par bake the shell for 20-25 minutes at 400 degrees.  Remove  discard the weights and cool while preparing the filling.

Note: I chilled my marble slab (if you have one) by sitting a rimmed baking sheet loaded with ice on it for an hour before rolling out the pastry.

For the filling:

8 oz Marscapone cheese
3 oz almond paste, crumbled into bits
1/4 cup honey
1 tbls sugar
1 tsp vanilla

Combine in a food processor or a bowl and mix on high speed until combined and smooth. Spread in the bottom of the tart shell evenly with an offset spatula.

1 pint Brown Turkey Figs stemmed and sliced
Arrange slices as shown or in a pattern that pleases you.

Brush the figs with a mixture of 1/4 cup apricot jam and 1tbls Moscato or brandy warmed in the microwave.

Bake at 400 degrees for 25 minutes or until edges or brown.  Cool completely before removing from tart tin.  Serve with ice cream or sweetened whipped cream.

Yum Yum!!

Friday, September 5, 2014

Flaky Sweet Pastry - So Simple Even a Child...

I can't claim to have mastered pastry although I take stabs at it now and then, only to prove I need more practice.  Recently, I encountered a young pastry chef from South Africa in a tiny resort town in the mountains of North Carolina.  Carla has top training and had worked in some fine resorts and clubs.  Now, she's set up shop on Hwy 107 in Cashiers, N.C. in a tiny kitchen outfitted with an Aga stove and producing some exquisite confections. I'd sampled enough of her flaky bottomed tarts to know this was the guru to show me the way.  She shared her simple recipe and pared it down for 4 pie size discs. I found it was still a bit much for my food processor to handle but it got it done.  It's really about keeping everything cold and being efficient when you roll out the cold dough.  I still need practice but it does produce a lovely tender pate sucre.  Omit the sugar and you have pate bris`ee.

True to training, Carla gave me the measurements in pounds and ounces. Professionals weigh everything, but I converted the measurements to conventional measure for the home cook.

Now here are the tips.
  • Everything should be cold. I mix the dry ingredients in a plastic bag and put them in the freezer for 20 minutes.
  •  Cube the butter then put it in a bowl and back in the refrigerator until ready to use.
  • If you have a stone or marble surface, chill it with a rimmed baking sheet covered with ice for 20 minutes. It doesn't hurt to do same to any surface you plan to work dough on. Lucky you if you have a well seasoned pastry cloth and if you do, you don't need me.
  • Chill the rolling pin, then flour it.
  • Chill the cooking tin or pie plate and after the dough is applied, chill 10 minutes before baking
  • Roll dough out from the center to make it circular. It won't be perfect. 

For 2 crusts:

1 1/4 cups all purpose flour
1 1/4 cups cake flour
2 sticks + 1 tbls  cold unsalted butter, cut into cubes
1 1/4 tsp salt
1 1/4 tsp sugar
3 oz ice water

Mix the flour, salt and sugar with a few pulses in a food processor.  Add the butter and pulse until until the mixture is small pea size ( about 15 pulses).  Add the ice water through the feed tube with the processor on and process just until the dough forms a ball.  Remove the dough and wrap in plastic. Chill for 1 hour or more before rolling out on a floured surface.  If baking blind, prick the bottom with a fork and weigh with dried beans or pie weights on parchment paper.  Bake according to your recipe.

Saturday, July 5, 2014

Sweet Cherry Cobbler on the 4th of July

  The Viet Namiese manicurists looked at my hands and gave me that "What have you been doing?" look. I had trouble making her understand I had spent quite a bit of time pitting several pounds of fresh cherries for a cobbler. I invested in a cherry pitter a few years ago and put it to work for my favorite cobbler.  Pitting cherries is a bit messy but a labor of love. It's got to be better than cleaning fish and I can never resist a fresh fruit in season (frozen works just fine if you're saner than me). Boy, was this a hit! Big sweet, juicy cherries baked in a batter that crusts up and browns with the chewy top and corners paired with vanilla ice cream.  Everyone from my 90+ parents to my 21 month old grandson loved every bite.  It's moments like these you wish you could bottle.

Happy Birthday America!!

3 cups cherries

1 stick unsalted butter
1 cup self rising flour
1 cup sugar
1 cup whole milk
1 tsp cinnamon

Preheat oven to 350 degrees

Place the stick of butter in a 9x12 baking dish while the oven heats and let it melt.  In the meantime, mix the flour, sugar, milk and cinnamon together until smooth.  Remove the baking dish as soon as the butter is melted and pour the batter into the melted butter.  Do not stir!!  Spoon the fruit over the butter and batter but do not stir!! Return to the oven and bake for 45 minutes until golden and bubbly.

Serve warm or at room temperature with vanilla ice cream.
 

Tuesday, December 31, 2013

New Year's Rum Raisn Ice Cream

I did the meanest thing I can think of to my husband tonight.  I added raisins soaked in rum to his beloved vanilla ice cream. (Read,  A Vanilla Kind of Guy,on this blog.)  He adores vanilla ice cream almost as much as me but forbids it in the house unless we are entertaining.  He says it calls him from the freezer late at night much like a siren in Ulysses' Odyessy calls a man to his doom. He fears ice cream for the effects on his waist and arteries. It's a poor mans' heroine for him.  On the other hand, he doesn't like raisins for some reason, I can't grasp why.  They're just dried up grapes, for goodness sake.  I'm expecting him to call a lawyer or poison control when he finds out, but I can't forget the a wonderful New Years we spent in Jamaica and rum raisin ice cream brings back the memory of soft breeze, calmly lapping surf and candle lite dinner.  Just the smell of Myers Rum sends me there. Wouldn't that be a heavenly way to roll in the New Year even if we are at home?

Wednesday, October 30, 2013

Pumpkin Spice Cupcakes with Caramel Icing

It's almost Halloween and I got the pumpkin urge.  These cupcakes use pumpkin pie spice, which is available this time of year, and is a little easier than measuring out the individual cinnamon, ginger, clove and allspice ingredients.  The batter also uses buttermilk which I think always makes for a better cake.  The icing incorporated a bit of the leftover caramel sauce I made for Apple Walnut Cake posted 9/15/2013.  That stuff would make fish eyeballs tasty. For an extra bit of panache, I decorated with Cracker Jacks. 

Happy Halloween!

For the Cupcakes:

1 stick unsalted butter at room temperature
1 cup packed brown sugar
1/3 cup granulated sugar
2 cups cake flour
2 tsp baking powder
1 tsp baking soda
1/2 tsp salt
2 1/2 tsp pumpkin pie spice
2 large eggs
1/2 cup buttermilk
1 tsp vanilla
1 1/4 cups canned pumpkin

for the Caramel Icing:

12 tbls unsalted butter
2 cups powdered sugar
1/2 cup caramel sauce (see 9/15/2013 blog post)
in a pinch, store bought will work

Preheat oven to 350 degrees.

In a mixer, beat the butter and sugars until fluffy.  In a mixing bowl, sift together the dry ingredients.  Add the eggs one at a time with mixer running on medium speed.  Mix the buttermilk and vanilla. Add the dry and wet ingredients alternately, starting and finishing with the dry.  Add the pumpkin and mix until just smooth. Line muffin tin with paper liners. Using and ice cream scoop fill each cup 3/4 full. Sit muffin tin on a baking sheet. Bake 20-25 mins until tooth pick comes out clean.
Cool completely.

In a mixer, beat the room temperature butter until fluffy then add the powdered sugar and beat until smooth. Drizzle in 1/2 cup of caramel. Ice each cup cake and decorate at desired. I used Cracker Jack for fun.

Sunday, September 15, 2013

Apple Walnut Cake with Caramel Sauce


I love the change of seasons.  I was sorry to seen the end of summer because it means vacation time, lazy days at the lake and less city traffic.  However, September is a favorite month because it's still warm but not hot and the humidity has lowered.  Now until the first freeze is our finest weather in my opinion.  It also means apple time. The most recognized fruit on the planet and in history. What other fruit can claim to be the fall of mankind with Eve's first bite, or the revelation of gravity to Sir Isaac Newton or the name synonymous with the computer generation.  Originating in Central Asia, the apple boasts over 3500 species today.  Apple is a most diverse food and a good apple cake is more temptation than I can stand.  This is totally delicious!  Give in.

Preheat the oven to 350 and generously butter and flour a bundt pan shaking out the excess flour.

1 stick of unsalted butter at room temperature
1 1/2 cups sugar
1/2 cup light brown sugar packed firm
3 large eggs
2 1/2 cups all purpose flour
1 tsp baking soda
1 tsp baking powder
1 tsp cinnamon
1/2 tsp fresh grated nutmeg
1/2 tsp salt
1 tsp vanilla extract
2 cups peeled and diced apple
1 cup chopped walnuts

In large bowl, sift together the flour, baking powder, baking soda, salt, cinnamon and nutmeg and set aside In the bowl of an electric mixer, cream the butter and sugar until light and fluffy.  Add the eggs, one at a time.  Add the dry ingredients in 4 portions, mixing each until just incorporated.  Add the vanilla extract.  Fold in by hand with a spatula, the nuts and then the apples.  Spoon evenly in bundt pan and bake 50 minutes or until browned and a tooth pic comes out clean.  Allow to cool in the pan 20 mins. before turning out.  Drizzle while warm with caramel sauce.  Serve with  a dollop whipped cream.

Caramel Sauce

1 cup sugar
6 tbls unsalted butter cut in 6 pieces
1/2 tsp salt
1 tsp. vanilla extract
1/2 cup cream

In a heavy skillet (I use a 10 in. cast iron skillet) heat sugar over medium high heat stirring constantly.  Just as the sugar is completely melted and starts to turn amber, turn off the heat and add the butter one tablespoon at a time stirring each addition until dissolved before adding the next.  Add the salt and vanilla and stir in.  Add the cream and stir. The pan will bubble vigorously so be careful.
Pour into a heat proof container and allow to cool 15-20 mins so it's still warm and pourable.  Drizzle over  warm cake and let soak in.  Serve cake with extra sauce if desired.


Sunday, September 8, 2013

Easy Fruit Cobbler

This is my favorite time of year to be a cook.  The fruits and vegetables are abundant and I'm busy trying to sample and prepare everything at it's peak.  I've been in delirium trying to can tomatoes and corn. Just think how smug I'll be in January with my Marinara sauce and Silver Queen corn pudding while everyone else is eating broccoli and potatoes.  I've fairly gorged myself on fresh cherries and after my son described the figs wrapped in prosciutto on his honeymoon in Italy,  I've been hooked.  Simple foods are always the best and this cobbler recipe is one of my favorite ways to enjoy the bounty of summer fruits.  It works well with berries, peaches, apples or a mix like I've done here - peaches and blackberries.  I love the juiciness of the fruits mixed with the sweet crust.  The crisp, chewy edge is my favorite.  Served with vanilla ice cream it's a luscious way to wrap up summer in a dessert.  All you have to remember  for this recipe is "1" of each ingredient.  It's too easy and too good to be true.

1 stick unsalted butter
1 cup self rising flour
1 cup sugar
1 cup whole milk
1 quart fruit
1 tsp cinnamon

Preheat oven to 350.  Place stick of butter in a 9x5 baking dish and melt in the oven.  While butter is melting, mix self rising flour, sugar and cinnamon together then whisk in milk and stir until smooth.
When butter is just melted, remove from oven and pour batter directly into melted butter.  Do not stir.  Spoon fruit evenly over baking dish.  Do not stir.  Bake 45 mins. until browned on top. Serve warm with vanilla ice cream.

Sunday, August 18, 2013

Carmelized Figs D'Oro with Buttermilk Panna Cotta

I cannot pass up the chance prepare something special with figs. They are a luscious and versatile summer fruit that can be found on everything from pizza to oatmeal right now.  I really like them best fresh but  they pair so successfully with savory cheeses and greens like arugula.  It's hard to know which way to turn but I've decided to ramp up all their rich sweetness by caramelizing them and adding a dash of  elegance with Moscato D'Oro and then serve over a more piquant buttermilk panna cotta. The ruby color from the figs is lovely. Opposites attract in this romantic dessert. Heavenly!

For the Caramelized Figs D'Oro

Rinse, trim and split lengthwise, 1 pint of brown figs
1/2 cup dark brown sugar
2 tbls Moscato D'Oro (or use another sweet dessert wine; rum or bourbon would work too)
1 tsp lemon zest
1 tsp balsamic vinegar (fig, if you can find it)
tiny pinch of salt

In a heavy medium sauce pan, add the brown sugar, Moscato, salt.  Cook over medium low heat for ten minutes stirring frequently. Do not let the sugar burn.  Add the lemon zest and figs and cook another 10-15 minutes.
Cool and serve at room temperature. Store in glass jars.

For the Buttermilk Panna Cotta

2 tbls spoons water
1 1/2 tsp gelatin
cooking spray

Sprinkle the gelatin over the water in a small bowl and let it bloom for a few minutes
Lightly spray 3/4 cup custard cups or molds with cooking spray and set aside.

1 cup whipping cream
1 tsp finely grated lemon peel
1/2 cup sugar
2 cups buttermilk
2 tsp vanilla extract

Heat the cream, sugar and lemon peel in a heavy medium sauce pan over medium heat stirring constantly until the cream just starts to boil. Remove from heat and let cool for 10 minutes. Add the softened gelatin and stir until dissolved.  Add the buttermilk and vanilla and blend.  Pour into cups and chill for at least 4 hours.

Sunday, July 28, 2013

Summer Fruits with Sauce Sabayon

In Italy, it's Zabaglioni, in France it's Sabayon, in America - well it's sort of like egg nog.  It all depends on what alcohol you use.  The variation of eggs, sugar and cream vary a bit but the end result in a rich custard type infused with your choice of booze.  But wow! It might be just the thing to guild the lily of  a mix of summer fruits in abudance right now but it has many uses.

We finished dinner last night with Alex's Sabayon.  It was perfect.

8 egg yolks
1 tsp salt
1 cup sugar
1 1/2 tbls fresh lemon juice
1 cup sherry
2 tbls brandy
1 cup heavy cream whipped

With hand or stand mixer, using the wisk attachment, whisk on medium speed, the egg yolks, salt, sugar and lemon juice until they are light, about 3-5 minutes.
Prepare a double boiler over simmering heat (remember, your cooking with steam, not boiling water, the bowl must not touch the water).  Add the sherry and brandy and stir the sauce constantly(this is easier to do with a hand held mixer) until the sauce it thick, 10-12 mins.
Cool the mixture covered. Whip the cream and fold into the sauce.


Monday, July 8, 2013

Chocolate Espresso Sorbet


Two of her favorites are chocolate and coffee, so that's what I made for the birthday girl.  They pair well together in this surprisingly rich and refreshing frozen summer treat.  We sipped cold cucumber soup in antique tea cups and nibbled cheese wafers before eating heirloom tomato and goat cheese tart with an arugula and avocado salad dressed with champagne vinaigrette.  The sorbet finished the meal with a luxurious flavor.  The chocolate/espresso is rich but not like a dairy based treat and satisfies those cravings.  I served it again, last night for my 89 year old mother's birthday following her favorite shrimp and grits.
She loved it too! Thank's to Ina for this recipe and the tomato tart.
 
 
2 cups sugar
1 cup very good cocoa powder (Valrona or Pernigotti)
1/2 tsp vanilla
1/4 tsp cinnamon
1/4 tsp kosher salt
1/2 cup brewed espresso (2 shots)or 2 tps instant espresso in 1/2 cup boiling water
1 tbls coffee liqueur
 
In a large sauce pan, mix the sugar, cocoa powder, vanilla, cinnamon and salt.  Stir in 4 cups water and the espresso. Cook over low heat until ingredients are dissolved.  Off heat, stir in the liqueur.  Transfer to a plastic ontainer and refrigerate until very cold.
Freeze mixture in an ice cream maker according to directions. The sorbet will be soft, place in a plastic container and freeze for a few hours until firm enough to scoop.


Friday, July 5, 2013

Buttermilk Pie for the 4th of July

Half the nation is in extreme drought conditions.  I happen to be in the other half.  We're at the lake and going stir crazy, it's rained 15 inches this week and no one can get outside; no boating, tennis, golf or hiking.  Mildew is in the air and my eyelids are starting to puff. This is the biggest weekend of the year here and it's a bust this go round.  Fireworks, concerts and picnics cancelled.  Every one's house is packed with family and guests and, I expect, in spite of card games, jig saw puzzles and TV, happy hour starts pretty early.  Thankfully, we are invited to an annual big covered dish event by the lake where the host (one of my "Giants", see 5/9/13 post) prepares all the fried chicken, ribs, etc. and the guests bring everything else. It's an epic feast.  Despite the rain, she's determined to go on with the show with a bunch of tents.  It's required a great deal of effort and engineering.  Everyone is dressed in full rain gear and determined to get out of the house.  I've never seen so many people look happy to huddle under drippy tents and drink and eat.  The children are running around barefoot in the deluge in a reprieve from confinement. They are at that age where jumping in mud puddles is such fun so I jumped in one myself just to bring out my inner child.  Heck, who cares if you get wet today?
Usually, I make peach cobbler for the 4th but I changed my mind since I had some buttermilk left from the cucumber soup and the weather's too bad to get to the roadside stands to get peaches, if they're even open.  Buttermilk pie is one of my favorites and it is the definitive "easy as pie".

1 unbaked regular pie shell (not deep dish)
1/2 stick melted butter, slightly cooled
1 cup sugar
2 large eggs
1 tbls all purpose flour
1/2 cup buttermilk
1/2 tsp vanilla

In a bowl, beat the eggs, then add sugar and flour and mix well. Add the melted butter, then buttermilk and vanilla. Pour into unbaked pie shell. Place on a baking sheet and bake at 350 degrees for 45 minutes or until lightly browned on top.  Cool completely before serving. Garnish with whipped cream if desired.