About Me

I have been cooking my way through life for over 50 years, beginning with mud pies as a child. I've turned a corner now and feel a Renaissance in my life. Recipes and Random Thoughts is my personal spin in a blog about how to prepare good food and how it prepares you for life. I want to share with you, honest to goodness food punctuated with perspective from the special memories and moments that have marked my journey.

Tuesday, December 30, 2014

New Year's French Scrambled Eggs with Caviar

Eggs are the best way to experience caviar and caviar goes with champagne and champagne goes with New Year's.  I think it's a grand idea to ring in the New Year at midnight with something to soften the effects of a bottle of champagne and salute the wee hours of unknown history with the indulgence of caviar. It's either the end of the world or a brave new world we are about to face and I prefer to face either with champagne and caviar.  So just after midnight and the kissing and so forth has subsided, I whip up this sublime French version of scrambled eggs for a cozy group of bon amis before we all crash.  The French provoke the eggs to curdle with gentle steam and enrichment of either cream or milk and, of course, butter, to produce a delicate, silky version of  the mundane most are familiar with.  Anointed with caviar and creme fraiche it's a warm way to welcome whatever is coming our way at dawn.  Happy New Year!

Consider two eggs per person

8 eggs at room temperature
1 tsp salt
pepper
1/2 cup milk
2 tsp butter, cut into teaspoon size

Creme fraiche and caviar for serving

 Over a double boiler,  heat the milk until just scalding. Do not allow the mild to touch the water. Cook by hot steam.  In a separate bowl beat the eggs, salt and pepper.  Drop in half the butter bits.  Add the rest of the butter bits to the scalded milk and then the egg mixture.  Stir over steam with a spatula constantly  around the edge and bottom until the eggs begin to curdle.  Transfer to a warm plate and garnish with creme fraiche, chive, and your choice of caviar.  Serve immediately with toast points and another glass of champagne if before 2 a.m. or a mimosa if it's after 6 a.m.

Happy New Year and Keep Cooking!

Monday, December 22, 2014

Chicken Liver-Green Peppercorn Pate'

Too many years ago at a summer concert, a friend who was a Cordon Bleu alum pulled out this pate' for us to nibble on as the orchestra warmed up.  I remember it as one of those gastronomic awakenings.  It wasn't bland, gummy chicken livers pureed into paste.  It was a lively, smooth spread marked with the a subtle difference of green pepper corns.  I immediately asked for the recipe and it is my one and only chicken liver pate'.

The apple doesn't fall too far from the tree since I first learned to enjoy pate' as my mother prepared it for a New Year's party back in 1968.  It was quite different from this but the basic elements where there and I was hooked.  When I prepared this version for her she went wild, so it will be part of our Christmas menu.  This pate' breaks out of the mold and adds that bit of spice without being overwhelming.

Take note, that water packed green peppercorns are no longer available (as far as I can tell) but the dried version, soaked in water, produce the same effect.

 5 tsp water packed or dried green peppercorns soaked in 1/2 cup water for 24 hours, then drain.

6 tbls unsalted butter
1/2 cup minced onion
2 garlic cloves minced
1 tsp dried thyme

Melt the butter in a skillet and sautĂ©  onion, garlic, thyme 2 minutes over medium heat.  Turn heat off and set aside.


Combine:

1/2 cup fresh celery leafs
10 back pepper corns
2 bay leafs
6 cups water

Bring to a boil and reduce to simmer for 10 minutes

Add 1 lb. chicken livers.  Simmer, slightly, 10 minutes and drain.  Discard celery leafs, pepper, and bay leafs.

Combine, cooked chicken livers, butter mixture, 4 tsp. of soaked green pepper corns in a food processor with:

2 tbls cognac
1/2 tsp salt
1/2 tsp all spice
1/4 cup heavy cream

Process until smooth, then add 1 tsp remaining soaked green pepper corns.

Pour into a mold and cover with plastic wrap.  Chill at least 4 hours and leave out 30 minutes before serving.

Sunday, December 14, 2014

Best Gingerbread Cookie Dough

I've baked a lot of cookies and made many gingerbread houses over the years and this is a great cookie dough to work with and makes a very tasty cookie that stands on it's own without fancy icing  or just a simple powdered sugar glaze.  This dough is for cookies and not sturdy enough for gingerbread  houses. I found this recipe on Food.com.

Preheat oven to 375 degrees.  Line a baking sheet with parchment paper.

Mix in a separate bowl, combine:

3 cups all purpose flour
1 1/2tsp baking powder
3/4 tsp baking soda
1/4 tsp salt
1 tbls ground ginger
1 3/4 tsp cinnamon
1/4 tsp ground cloves

In a mixer with paddle attachment, combine:

6 tbls room temperature unsalted butter
3/4 cup dark brown sugar
1 egg at room temperature
1/2  cup molasses
2 tsp vanilla

Add the dry ingredients a little at a time and mix until just absorbed.  Wrap dough in plastic and let rest at room temperature for at least two hours and up to eight or up to four days in the refrigerator.
Divide dough in half and rewrap unused half and return to refrigerator.

Roll out on floured surface with floured rolling pin to 1/4 inch.  Use cookie cutter to cut into shapes.

Bake 7-8 minutes, depending on size of cutter.  Let sit on baking sheet for 1or 2 minutes after removing from oven before cooling on a wire rack.  Cool completely before decorating.


Friday, December 12, 2014

Good Gravy!

Elevate simple to sensational with a couple of ingredients you normally don't indulge in - cream and cognac.  Most cooks use butter on a regular basis but cream is reserved for desserts and holidays. Cognac or brandy; most don't keep on hand but worth the investment for foodies, if not something you drink along with a cigar.

A chicken breast, simply seasoned with salt and pepper, then browned in a mix of butter and olive oil, then finished restaurant style in a 350 degree oven is a fine, preparation for any family meal.  My husband and I enjoy this frequently but it's the holidays and I'm really looking for ways to dress up the basics.  So I served it with this lovely sauce and my husband's said, "Hmm, really good."

Here's the scoop!

Preheat oven to 350 degrees.

Mix 1/2 tsp pepper and 2 tsp Kosher salt and season two skin on chicken breasts with ribs (I prefer skin on without ribs, which you or your butcher will have to do).
Brown breasts in 2 tbls butter and 2 tbls olive oil over medium high heat in a heavy skillet.  4-5 minutes per side. Bake for 35-40 minutes.

Remove from the oven to a plate and tent.  Pour off all but 1 tbls fat.  Saute in the pan until juices released (4-5 mins):

1 tbls minced shallot
8 oz.sliced porcini mushrooms

Add:

1/2 cup chicken essence or stock
deglaze the pan and bring to a simmer

Add 1/4 cup cream and and heat to simmer. Add 1/4 cup brandy or cognac and heat to simmer stirring frequently and sauce is reduced and slightly thickened.  Correct seasoning.  If you use essence, there is little seasoning to do.

Spoon over chicken and serve immediately.

Monday, December 8, 2014

Coquilles Saint Jacques

This is an elegant, classic first course served in scallop dishes or as a main dish served in individual gratin dishes.  I first encountered Coquilles Saint Jacques at a lovely old inn in my father's home town.  I was about 12 and, once again, introduced to sophisticated dishes not served at home.  It was love at first bite.  It's meant to prepared with scallops and I used bay size. They fit the presentation better than the larger variety.  I happen to keep seafood stock in my freezer but clam juice is an acceptable substitute, better yet, poach the scallops in water, onion, halved whole lemon and pepper corns and bay leaf, then reserve the stock.  Add brandy for the holiday season and rock on.

* see bonus seafood stock at the bottom

4 tbls unsalted butter
1/2 cup minced shallot
2 cloves minced garlic
8 oz sliced mushrooms (your choice)
1/4 cup sliced green onions
1/3  cup all purpose flour
1 tbls curry powder
1 tsp white pepper
1 1/4 cup seafood stock
1/2 cup cream
1/4 cup brandy
salt to taste
1 1/2 cups Panko bread crumbs
1/4 cup fresh chopped flat leaf Italian parsley
1/2 cup grated Gruyere cheese
1/4 cup good olive oil
2 lbs bay scallops

Melt the butter in a large fry pan and add the shallots when the butter foams.  Cook stirring frequently for 2-3 mins then add the garlic and cook for 30 seconds before adding the mushrooms.  Continue to toss the mushrooms, shallots and garlic until the mushrooms release their liquid and are soft.  Add the  green onions, curry, white pepper and combine.  Add flour and combine; cook for 1 minute.  Add the seafood stock slowly and stir until smooth.  Add the cream and bring to simmer.  Add the brandy and salt to taste.  Bring just to the boil and reduce heat.  In the mean time, butter 6 ramekins.  Mix the bread crumbs, chopped parsley and gruyere with the olive oil. Divide the scallops and sauce evenly amongst the ramekins and top with bread crumb mixture.  Arrange on a rimmed baking sheet and place under a preheated broiler for 4-5 mins. Serve immediately.

Seafood Stock

1 lb fish frames and shrimps shells (heads, if you are brave)
1 onion peeled and quartered
1 lemon split in half
10 whole pepper corns'
1 bouquet garni
Cover with 6 cups water cold water.  Make sure ingredients are covered

Bring to a boil and reduce to simmer.  Reduce to 1 quart.  Strain through cheese cloth and cool.  Freeze  up to 6 months.

Thursday, December 4, 2014

High Spirits for the Holidays; Cooking with the "Hard Stuff"

The holidays are the time to bring out the "hard stuff" - alcohol, not red or white wine but the distilled libations that give your recipe a real kick.  I'll never forget popping one of my aunt's bourbon balls as a kid by mistake.  Nobody told me not to and I had to run to the bathroom to spit it out.  I wasn't ready for the "hard stuff".   I was about 8 when my mother worked on Brandied Fruit from Thanksgiving to Christmas.  As the fruit fermented, our kitchen smelled more like a bar than home.  I couldn't understand anyone ruining perfectly good fruit with something that smelled that peculiar.  On Christmas Eve, it was finally ready and served with ice cream and pound cake.  I took a timid sample and, promptly but discretely, spit it into my napkin.  I was always exposed to more sophisticated foods from an early age and, apparently, my parents where not adverse to food prepared with alcohol.  I was never admonished not to taste or try any food, for that matter, I was always encouraged just to sample a bit and have an opinion.

Now, I'm putting bourbon in the pecan pie, rum in the cake and sherry in the creamed turkey and  pulling out the brandy to dress up the sauces.  I usually reserve brandy for coq au vin but I feel like making a silky sauce tonight that is excellent with beef or chicken.  It's the season to make everything extra and over indulge.

Spirits add that touch of elegance that make any holiday dish special so if you are making oysters Rockefeller, buy Pernod; a dessert soufflé,
buy Grand Marnier and be sure to spike the eggnog.  I've recently heard a remarkable recipe for goose marinated in gin!! I'm hoping to make Syllabub this year.  Stay tuned.  My spirits are HIGH for the holidays!


Wednesday, December 3, 2014

Creamed Turkey with Sherry

This recipe was the post-Thanksgiving dish served when I was growing up so, I decided to give it a whirl tonight as I'm mulling the left-over turkey.  I  thought it was as good as the big roast turkey and the sandwiches that followed the next day.  The trick here, as I've tried to emphasize repeatedly, for any good sauce, is to have homemade stock or "essence" in the freezer.  I always strain and reserve the juices from a cooked chicken and vegetables.  I let the fat rise and chill in a refrigerator, then scrape off the fat and reserve the gelatinous essence in the freezer.  The essence is already seasoned and is far superior to any store bought flavor booster or bouillon.  It's a great kitchen habit and the mark of a superior cook well worth the effort.  Invest in a "fat separator" to assist you and it will set you apart when it come to soups and sauces.  My mother and grandmother added sherry to this sauce to make it "gourmet".  I never think of the left-over turkey as repetitious but an opportunity to keep the holiday going.

2 tbls unsalted butter
1 cups diced onion
1 clove garlic, minced
1 tsp fresh minced thyme or 1/2 tsp dried
1 pint sliced mushrooms of choice
2 tbls flour
1 cups chicken stock or essence
1/2 cup half 'n half
2 cups cooked turkey, diced or shredded
2 tbls sherry
salt & pepper to taste

Melt the butter over medium heat in a 10 inch fry pan and saute' the onion for 4-5 minutes, then add the garlic and thyme.  Cook another minute stirring frequently.  Add the mushrooms and cook until their liquid is released and they are soft.  Add flour and combine with vegetables until smooth.  Add stock and stir to make a smooth sauce.Add the half n' half and bring to a simmer.  Add the turkey and sherry.  Heat to simmer, adjust seasoning and serve over cooked brown rice.


Wednesday, November 26, 2014

Holiday Rum Cake

I don't have to do much cooking for Thanksgiving. It's a "bring a dish" gathering with our family but when my son and daughter-in-law arrive late tonight, I like to have something for them.  I prepare 'do ahead' grazing recipes for feeding impulses and the extra pounds that come with those impulses.  I'm cooking a turkey breast for sandwiches and making a big pot of Pasta Fagoli soup (see Jan 2012 post) as a light but comforting 'welcome home" meal.  I settled on Rum Cake for dessert.  A patient of my husband used to give his office a rum cake every year that was divine.  I love anything with rum in it. It's the sort of cake that can sit under the cake stand dome and beckon you any time with it's moist rummy flavor.

Now for the awful truth.  It's the recipe that is made with yellow cake mix and Jello pudding mix.  I thought about a scratch version but knew it would never quite match the classic posted so many times on the internet.  If it ain't broke don't fix it.  I had some caramel sauce in my refrigerator and added half a cup on rum to make the glaze (see Caramel Confidence, Oct. 19, 2014).

Preheat oven to 350 degrees.  Grease and flour a 10 inch bundt pan and set aside.

4 eggs beaten
1/2 cup canola oil
1/2 cup water
1/2 cup dark rum

Mix these ingredients with and electric mixer until well blended.
Add:

1 box 18.5oz box of yellow cake mix
1 oz box Jello vanilla pudding mix

Pour into prepared bundt pan and bake for 45 minutes.  Remove from oven and poke hole with a skewer over the surface.  Pour 1/2 cup of caramel  rum glaze over the warm cake.  Turn out onto cooling rack with parchment or something to catch the excess glaze.  Poke holes over the top and pour the remaining 1/2 cup over the top. Garnish with toasted pecans or walnuts.

Monday, November 3, 2014

Braised Chipollini Onions

Braised Chipollinis
Chipollini Onions are a sweet surprise.  Next to the Vidalia, they are almost equal in flavor but not size.  Their small, flat shape lends them to stews and braises and they make a excellent side to any red meat.  I served them with grilled lamb chops last weekend for a hearty fall meal.  They have an earthy quality but delicate flavor that allows them to stand alone on any plate.

They are a bit of a pain to peel but a minute in a pot of boiling water and a sharp knife makes swift work of the onion skin, root and stem.  They are well worth the effort.
Peeling a blanched chipollini

12 Chipollini Onions, blanched, trimmed and peeled.
2 tbls unsalted butter
1/4 cup beef or chicken stock
1/4 cup balsamic vinegar
salt & pepper

Melt the butter in a small sautĂ© pan and add the onions.  Cook over medium heat until the begin to brown.  Reduce the head and add the stock and balsamic and cook until the liquid is reduce and the onions are glazed and brown.  Season with salt and pepper and serve immediately.


Monday, October 27, 2014

The Dreaded Tuna Noodle Casserole - Redeemed

I knew it when I came in from play at the neighbor's house.  Daddy's car was missing and the kitchen was dark and quiet.  There was no sign of dinner except for the little red light on the oven.  Then my mother appeared in her slip with rollers in her hair.  That was it, they where going out and I would be left at home with a baby-sitter.  Daddy had gone to pick up some dried up spinster or widow Mother had spied at church.  My Mother  took the dreaded tuna noodle casserole from the oven and said I could eat on the rug in front of the den TV and watch Flintstones and Jetsons if I didn't spill anything and added I could stay up until 10.  Then she vanished to her bedroom to finish dressing, painting her eyelids in peacock blue eyeshadow, dowsing herself in Bal de Versaille perfume and donning high heals and rhinestone earrings.  I never had one of the many teenage baby-sitters in our neighborhood who brought the Elvis or Buddy Holly records, played with your Barbie and giggled on the phone with a boy.  Oh no! Just the retired missionary or elderly Sunday school helper who couldn't even play Pick up Sticks or draw with crayons.  So I sat sulking in front of the TV, picking at the dreaded tuna noodle casserole so many woman found miraculous  in the Campbell Soups advertisements in Ladies Home Journal.  Boiled spaghetti, a can of tuna, a can of cream of mushrooms soup topped with cheese.  Need I say more?  I ignored the babysitter as much as possible and watched TV until she nodded off.  Then snuck to my parents bedroom to try and refashion myself after mother's hair and make up and spill a lot of perfume all over me.  The baby-sitter and I rarely spoke.  I brushed my teeth and went to bed quietly just to avoid them.

Eventually, the golden arches showed up in my town and drive thru replaced the DTNC (dreaded tuna noodle casserole).  Daddy called McDonalds the tomain tavern and told me I'd have pimples if I continued to eat French fries and milk shakes.  So what?  I loved the action as much as the food and my mother sure wasn't opposed to it.  The teenagers and college students where there and it was as close an encounter as I could get with their heavenly world for the time being.

So why should I try and redeem that loathsome DTNC? Just call me sentimental or I like a challenge.
Sunday night is typically a one pot meal at my house and this fits the bill.  You'll have to open a can of tuna but not a can of soup.  I have to admit I had leftover broth from a scallop dish that really helped flavor this but clam juice is a decent substitute.

Preheat oven to 350 degrees.

8 oz Farfalle, cooked according to package directions and drained
12 oz can chunk lite water packed tuna
4 tbls butter + more for casserole or ramekins
1 cup milk
1/4 cup all purpose flour
1 cup clam juice (fresh fish stock if you have it)
2 sliced green onions
1 cup frozen green peas
8 oz sliced mushrooms
1 tsp fish sauce
2 tbls dry sherry
1/2 cup grated parmesan cheese
1 cup Panko bread crumbs mixed with 2 tbls melted butter

Melt the butter and sautĂ© the mushrooms until soft and they release moisture.  Add the sliced green onion and cook 2 more minutes.  Add the flour and combine.  Add the milk and clam juice slowly to make a thick sauce. Season with salt and pepper and add the sherry and frozen peas.  Butter ramekins or casserole and  spread the Farfalle evenly on the bottom.  Pour the tuna mixture over the pasta and top with Parmesan.  Bake for 30 minutes and top with the buttered Panko. Bake 5-10 more minutes until golden.

Sunday, October 19, 2014

Tips for Caramel Confidence

dry method with butter & cream
Caramel is sugar cooked to a temperature where it breaks down to its components glucose and fructose and then dairy ingredients added, most often, cream and butter, then flavorings (vanilla and salt).  Cooked sugar can take the form of brittle, icing, sauce, or candy, to name the most familiar. I've already published a caramel sauce recipe(Sept. 15 2014-Apple Walnut Cake with Caramel Sauce) and frankly, any form of caramel takes practice, so these are some tips that will give you confidence when cooking sugar.  I usually get it right 99% of the time but there's that occasional moment  of distraction or something in the chemistry  that turns my favorite dessert sauce to a burned, lumpy nasty mess in a second.  There are some basics of cooked sugar that should lessen your chance of disaster when attempting a caramel of any style.  No matter how you make your caramel, it will add a fabulous complexity of flavor to any dish.

There a two methods for making caramel: wet and dry.  The dry method is simply heating sugar in a dry pan until the sugar liquefies and browns.  This requires careful attention to heat and color without a candy thermometer.  Use a wide surface heavy fry pan for this method so the sugar is distributed in a thin even layer. This encourages more even browning.  The technique for moving the melting sugar may be swirling the fry pan and never stirring or stirring the sugar a little in the beginning to get the flow going but after that point a stirring device will cause crystallization to form around the spoon so swirling is desirable as soon as the sugar starts to liquefy. Add, butter, cream and flavoring (salt & vanilla) once the sugar liquefies and you have a caramel sauce.  The finished, cooled sauce should be smooth and thick enough to fall in a ribbon from a spoon.  It will thicken more as it cools.

perfect dry method caramel sauce
The wet method adds a little water to sugar,  then boils the mixture to a certain temperature.  Using a heavy, wide sauce pan you must always be on guard to keep any crystals from forming on the side of the pan because it can cause a chain reaction and turn the clear syrup to opaque and grainy.  The wet method is a little more forgiving as the water slows the heating and there are various techniques to avoiding crystallization. Washing down the sides of the pan with a damp pastry brush or covering the pot with a lid to trap steam will dissolve those crystals.  Don't stir the syrup until it starts to show color.  This is an indication 80% of the water has evaporated.  Use a candy thermometer for accuracy and keep a bowl of cold water handy to cool the temperature down when you see the right color.  Submerge the bottom of the pan for a quick cooling method.

wet method cooking with a thermometer

Know what temperature you need.  Caramelization begins around 320 degrees when the sugar melts.  At 340-350 degrees, the color progresses to medium brown and, when cooled, will still be hard but not brittle.  At 365-380 the caramel is dark brown and will cool to a softer texture.  This is where to add cream and butter, etc. to make sauces or candy.  Anything above 410 degrees is "black caramel"  typically only used by professional bakers.

I prefer the dry method for sauces and in making caramel. For this post both techniques did develop a few lump which I just strained out with a gravy stainer.  Lowering the temperature will usually help them dissolve. Any recipe could dictate which method you need but it is the dedicated home cook who can master both, so give both some effort.  Your friends and family will be impressed.

Beware of molten sugar.  It's hotter than boiling water and can adhere to the skin and cause serious burns!!  Don't taste until it cools.

Tuesday, October 14, 2014

The Table Favor

It's nice to add a table favor for a special occasion meal. We always had a table favor for Christmas Eve dinner.  It was usually personalized with your initials and someone had gone to a good bit of trouble to make it.  My favorite, will always be the red blinking Rudolf nose we all unwrapped with dessert.  It seemed to suit the festive atmosphere after too many toasts.  Our friends wore them as they drove home that night and got quite a few stares when they stopped for a red light.  As children, birthday parties were notorious for goodie bags and favors. Sometimes, I thought it was the only reason to accept an invitation and the contents of the goodie bag were dumped out immediately when you got in your parents' car and examined and rated. It only seemed fair to me, that if I was to grace a party with my presence and bring a wrapped gift, I should receive something for the trouble.  Brat!

I used to do a lot of very clever decorated cookies, thanks to the inspiration of Martha Stewart.  I sold quite a few as a "little something" at Valentines or a stocking stuffer at Christmas.  Wrapped in little cellophane bags and cinched with a bit of raphia, they where a hit.  I've long since retired from that labor intensive endeavor but recently had a request from an old friend for a bridesmaids luncheon table favor.  I only do these for special people when I'm in the mood and this was one of those occasions.  Designer wedding cookies have become soooooo elaborate but I found just the thing using a heart shaped cutter and just white icing.  Each is an individual styled gown bodice.  They are cute and the MOB (mother of the bride) gave that squeal of delight that let me know I'd hit the mark.

I'm looking forward to resuming decorated cookies for my grandchildren and anyone else deserving.  They are definitely a labor of love and quite gratifying.  A pot roast or souflee is easier.  A sabayon is elegant and sushi takes skill but nothing satisfies my culinary ego like a pretty decorated cookie.

Sunday, October 5, 2014

Butternut Squash Risotto with Baby Leeks

It always pays to have a well stocked pantry and freezer. I'm usually in the kitchen early enough to give dinner thorough consideration and my complete attention, but not today.  I had no plan and got home later than usual but with my first butternut squash of the season and some baby leeks I could whip up one of my favorite comfort meals - butternut squash risotto.  I've never seen "baby" leeks before so I had to grab them, but regular leeks or 1 cup of diced onion works just as well. I always have olive oil and wine on hand so keeping Arborio rice, Pancetta, Parmesan, fresh thyme and homemade chicken stock readily available insured a delicious and cozy evening meal  for two with just a quick stop at the grocery for the fresh vegetables.

Risotto doesn't have a reputation as an efficient meal but it can be done in about 45 minutes if you use the narrow end of a larger butternut squash and save the bulb end for later (skipping the scooping of the seeds).  Use a vegetable peeler and a sharp knife to make short work of the prep.  The baby size leeks were quick to slice and chop (remember the folds of the leek must be thoroughly washed for sand but this baby size had none).  I thawed the stock in the microwave and warmed it in a separate sauce pan until ready to use but store bought is fine.  I had already grated a good bit of a chunk of Parmesan and had it ready in a zip lock bag.  Now this is NOT a Rachel Ray 30 minute meal or a Ree Drummond 16 minute meal.  Adding the chicken stock in 1 ladle at a time does take a bit of patience, so have a glass of wine and unwind.  If you want to prepare this in advance, incorporate 2 cups of the stock, cover and then finish the remaining stock just before serving.  It takes 3-5 minutes to incorporate each addition of stock.


1 tbls olive oil
2 oz diced Pancetta
1 tbls butter and more as necessary
2 cups diced butternut squash (1/2 inch cubes)
1 cup white part leek sliced to 1/4 inch (or substitute,1 cup diced onion)
1 tsp chopped fresh thyme (or substitute 1/2 tsp dried thyme)
1 1/2 cups Arborio rice
1 cup dry white wine
4 cups chicken stock
1 cup grated Parmesan cheese
salt & pepper

In a large fry pan, heat the oil and add the Pancetta over medium heat.  Cook Pancetta until fat is rendered and meat has just turned brown.  Remove Pancetta and drain on paper toweling.  Pour off all but 1 tbls fat.  Reduce the heat and add the butter and butternut squash and saute' until slightly browned, then add the sliced leeks and thyme and cook another minute or two. Season the vegetables with salt and pepper. Remove vegetables and set aside.  Add more butter and the rice and cook stirring until the grains look milky white.  Deglaze the pan with white wine. Stirring up and loosen all brown bits.  When the wine is almost absorbed, add chicken stock 1 ladle at a time, stirring constantly.  Add the next ladle as the liquid is absorbed after each addition.  When all the liquid is added, return the Pancetta, vegetables and the Parmesan and combine.  Add a little water if necessary.  Adjust the seasoning. The rice should be creamy.

Monday, September 22, 2014

Autumnal Equinox Dinner - Duck Marsala

Autum official begins at 10:29 p.m. and right on cue, the weather changed today.  It's cooled down to the 70's, the humidity is lower and the sky is clear and bright blue. I always hate to see summer end but there's something thrilling about that first hint that fall is on the way.  So I have to mark the occasion with a special meal and I feel like duck is the appropriate focus and ramps up traditional chicken marsala. It reminds me of my father and grandfather hunting and bringing home duck for dinner when I was a child.  They'd laugh and say, "Let's have duck dinner, we brought the duck."  Individually packaged duck breast is available in many grocery stores or on line as is duck fat.  You don't have to go hunting.

4 duck breast, rinsed under cool water and patted dry
1 tbls spoon duck fat or 1 tbls olive oil
1 large shallot, chopped fine
4 oz. sliced baby bella mushrooms
8-10 fresh figs, stem removed and halved lengthwise
1/2 dry marsala wine
1/2 cup chicken stock
1/2 tsp chopped fresh thyme or 1/4 tsp dried
salt & pepper
1 tbls unsalted butter
fresh chopped parsley for garnish

Preheat oven to 350 degrees

Season the duck breast liberally with salt and pepper
Add the duck fat and olive oil to a large skillet and heat over medium high heat.
Add the duck breasts skin side down and allow to brown 5-7 minutes. Adjust heat if necessary.
Turn over and brown 5 more minutes.
Place in preheat oven for 7 minutes. Duck skin should be brown and crisp.
Remove from oven and move duck to a plate and tent with foil.
Pour off all but 2 tbls fat. Remember the handle is hot.
Add the shallot, mushrooms and thyme and saute' for 3 minutes until shallot softens
Add the wine and chicken stock.  Deglaze the pan and heat just to a boil then reduce heat and cook down until reduced by half.
Add the figs and cook for another minute.
Swirl in the butter.
Pour the reduced sauce over sliced duck, garnish and serve immediately.

Backyard Tailgate, Brats & Beer

My son got bitten by the craft beer brewing bug some years ago. I guess there's something in his genes that urges him to cook. It all began when he was in Australia for a college semester and came home with a brew kit.  Now, he's gotten more sophisticated and his garage is an elaborate home brew stage.  His wife makes up cute lables on her computer and it's all great fun.  When he gets together with buddies to watch football, he brings a cooler of his latest and they critique the beer and teams.
New Country Cozy Blond

 So what goes with cold beer and football?  How about some brats steamed in beer and finished off on the grill, then topped with grilled onions and peppers on a buttered and toasted bun. Good times for all!

Put 5 or 6 bratwurst in a single layer in a dutch oven or a deep fry pan with a lid. Add one bottle of beer and two tbls whole grain mustard.  Heat covered until the beer just starts to boil then cut the heat and let the brats steam for about 15 minutes until no pink is visible.

Prepare a charcoal fire or a gas grill.  Slice 2 large onions and 2 green peppers, cored and seeded and sliced into thin strips, and toss in a neutral oil to coat.  Add peppers and onions to a grill basket over indirect heat. Grill until lightly browned.  Finish the steamed brats on the grill until nicely browned. About 5 minutes.  Split hoagey rolls and butter the inside and place on the grill for just a minute to toast.  Assemble and serve with German mustard if desired and with a nice cold beer.

Wednesday, September 17, 2014

Kale Pesto Change-o

I admit I've haven't had enough enthusiasm for the latest super food, kale.  It's nutritional qualities are outstanding but I've been a slacker putting it on my grocery list. I'd rather have it in a restaurant or salad bar. It stinks when you cook it and I hate for my kitchen to smell bad. It has that sulphury quality when cooked that I associate with certain bitter greens that need prolonged cooking.  It's leaves are tough and fibrous versus the more tender turnip or chard variety that I prefer.  Kale salads are tasty enough but they need a lot of makeup ingredients to balance kale's slight bitterness and dense texture.  So I solved those issues by making kale pesto. It's my answer to work this nutritious green into my diet more often. The kale is blanched, then chopped finely in a food processor with traditional pesto ingredients.  It's quite tasty on pasta and slathered inside a sandwich.  I even used it to garnish tonight's dinner of roasted salmon over Provencal ratatouille.  I don't won't to miss out on nutrition so, "pesto" change-o.  Kale transforms from a tough bitter green to a bright green more sophisticated form with  multiple uses.

  • 1 bunch of kale, stem removed; leaf part only by running the tip of your knife up either side of the stim until it ends.  Then chop across into 2 inch ribbons.  You should have 3 ozs of kale leaves.
  • 3 peeled garlic cloves
  • 1/2 cup Parmesan
  • 1/2 cup toasted pin nuts (optional)
  • 3/4 cup good olive oil such as Oli & Ve Picual
In a large pot, bring 2 quarts of water and 2 tbls Kosher salt to a boil.  Prepare a bowl of ice water and set aside. Add the chopped kale leaves to the boiling water and return to a boil.  Cook for one  minute. Drain the kale into a strainer or remove from the hot water with a strainer and plunge the wilted kale into the ice water bath immediately to stop the cooking.  Drain thoroughly after a few minutes in the ice water bath and wrap the kale in a clean linen or cotton dish cloth.  Dry the kale as much as possible until the kale is moist but no excess water exists.
 
Put the kale and garlic in a food processor and pulse 6-8 times.  Add the Parmesan and pine nuts, if using.  With the processor on, add 3/4 cup olive oil through the feed tube. Add process just until the oil runs through, about 1 minute.

Makes about 1 1/2 cup.  Store refrigerated with a little extra olive oil on top to inhibit oxidation.

Monday, September 15, 2014

"3 G" Spread: Green Olive, Goat Cheese and Green Onion

I found some wonderful green olives in a gourmet foods store this weekend and added them to cocktail nibbles before dinner that night.  I forgot to ask the name of the variety, but they were bright green in color, lovely in flavor and less briny than say, Kalamata.  I could have gobbled them all up.  My research came up with Castelvetrano olive but they are easy to pick out because of their color. The left overs where too good to waste so I put them together in a food processor with goat cheese and green onions.  This turned into a new favorite! I think I'm going to try it stuffed in a chicken breast.

1 cup Castelvetrano Olives
4 oz. goat cheese, at room temp
2-3 green onions, white and green parts, sliced thin
Fresh cracked pepper

Put the olives in the processor and pulse until they are a roughly chopped. Add the goat cheese and green onions and process just until combined and leaving texture to the spread.  Finish with a little cracked pepper when served.  Enjoy on crackers or as a stuffing to a chicken breast.

Friday, September 12, 2014

For Better For Worse, But Not For Lunch

I have been married 38 years.  That's 13,595 days and most of them have involved responsibility for my husband's lunch.  He eats a very light lunch and it's not a big deal; salad or some leftovers but most wives in urban settings in the 21st century are not confronted with their spouse midday.  I don't have to actually be present, just have the fixings available.  A very particular kind of lettuce and fruit, my homemade salad dressing, a homemade soup, a slice of my homemade whole wheat bread.  For a while he made the rounds at the sandwich and salad bar establishments and a diner or two but always found his way back to my kitchen.  Light, easy, quick and cheap and no tipping.

His job doesn't involve travel. No living or eating on the road, no power lunches.  At the most, he gets a sandwich on the golf course on weekends.  Even in graduate school, when we first married, he asked me to make him a sandwich for lunch because it took too long to walk over to the university cafeteria and it would save us money.  I really hated making tuna fish at 6:30 in the morning.  Then we had our first child and a microwave not long after.  His office was close to home and I didn't mind having a little relief during the day. I could nuke a hot dog or flip a grilled cheese while he bounced the baby.

Lunch is nothing more to my husband than a quiet moment to breath in a dizzy, breathless sprint each day.  He can't be weighted down or drowsy after a Big Mac or corporate lunch. It is just a blink in his working hyper focus.  Conversation is minimal as he chills without losing too much steam for the rest of the day. Then he flips the switch at five for some exercise and a civilized evening meal. It really is a pretty nice schedule.  He's a work hard, play hard type. 

 I can summarize life of lunches beginning with a  lunch of graham crackers and peanut butter as an old favorite.  As a youth, his mother banished he and his brothers to the backyard swimming pool on any summer day with drinks, a pack of graham cracker and a jar of peanut butter for the day. They didn't come inside until evening. When we took our teenagers to New York, hubby was so determined to spend every minute pounding the streets to museums and so forth, he was shocked we wanted to stop for lunch. Even petite de'jeuner in France took some persuasion. Hikes in the Rockies have been referred to as a "forced march". 

 I had no choice but to pack my children's school lunches during elementary school.  I'll never forgive the one who traded his homemade vegetable soup for a packaged Oscar Mayer Lunchable.  I happened to be at the school that day and wandered through the lunch room and found his thermos right on top of the garbage still filled with the soup I'd labored over.   When he confessed to trading the  nutritious vegetable soup for processed bologna, cheese and crackers, I was crushed.  Of course, this is the same adult child who occasionally shows up at lunch and rummages through the refrigerator. "Can I eat this?"

I'm not sure what is so attractive about eating lunch at home.  It's not much of a meal but it's what they want, not the super sized spread of the metropolis.  So I'll keep my lunch counter open.  For better for worse, lunch is part of the deal.


Wednesday, September 10, 2014

Fig & Almond Tart

Practice makes perfect and I'm not perfect yet with my Pate Sucr`ee.  Today, I took advantage of fig season for another round of pastry homework and made a beautiful tart.  Pastry dough takes practice and I'm excited to try all sorts of wonderful fruits of the summer with this marvelous crust. I've already made a peach raspberry pie and today the fig tart.  I'm in love with the fig and almond combination.  This tart has the "Wow" factor as a dessert. So roll up your sleeves and roll out some more pastry.  The rest is easy. It doesn't hurt for the figs to be firm.

For the Pastry:

1- 5 inch disc of chilled pate sucr`ee (see blog post 9/5/2014)

Roll out to 1/8 inch, roll up on a rolling pin and apply to a 10 inch  remove able bottom tart pan and prick the bottom with a fork(docking). Chill in the refrigerator for 30 minutes. Line the tart shell with parchment paper and fill with pie weights or dried beans, par bake the shell for 20-25 minutes at 400 degrees.  Remove  discard the weights and cool while preparing the filling.

Note: I chilled my marble slab (if you have one) by sitting a rimmed baking sheet loaded with ice on it for an hour before rolling out the pastry.

For the filling:

8 oz Marscapone cheese
3 oz almond paste, crumbled into bits
1/4 cup honey
1 tbls sugar
1 tsp vanilla

Combine in a food processor or a bowl and mix on high speed until combined and smooth. Spread in the bottom of the tart shell evenly with an offset spatula.

1 pint Brown Turkey Figs stemmed and sliced
Arrange slices as shown or in a pattern that pleases you.

Brush the figs with a mixture of 1/4 cup apricot jam and 1tbls Moscato or brandy warmed in the microwave.

Bake at 400 degrees for 25 minutes or until edges or brown.  Cool completely before removing from tart tin.  Serve with ice cream or sweetened whipped cream.

Yum Yum!!

Monday, September 8, 2014

Pork Tenderloin with Blueberry Balsamic Sauce

Neglected items in the refrigerator can be the beginnings of some great meals. There were some lingering blueberries that just weren't sweet enough for me so they where on the verge of being tossed
(something I hate to do) when I decided to turn them into blueberry jelly.  Just the blueberries and sugar cooked down and the pressed through a chinois and into a jar and back into the refrigerator. Next day,  I was in my favorite condiment store, Oli & Ve, and decided to mix some of their balsamic in. Here's what happened.

For the blueberry jelly:  In a medium heavy sauce pan combine;

2 cups blueberries and 1 cup sugar

Stir to combine and cook over medium heat until the sugar dissolves and combines with the juices. Bring to a boil and reduce to low for 20 minutes.  Strain and press through a fine mesh seive. Refrigerate until ready to use. Makes about 1 cup or more.

For the pork tenderloin: 1 lb or larger tenderloin season on all sides with a mixture of;

2 tsp finely chopped rosemary
1 tsp finely chopped thyme
1 tsp lemon zest
1 1/2 tsp Kosher salt
1/2 tsp black pepper

Wrap in plastic and refrigerate for 1 hour.

In the meantime, put the blueberry jelly in a small sauce pan with 1/2 cup best balsamic vinegar and bring just to a boil then reduce to simmer and continue to cook while preparing the tenderloin.

Preheat the over to 350 degrees. Heat 2 tbls olive oil in a large oven proof saute pan until oil shimmers but not quite smoking.  Brown the tenderloin on each side two minutes. Spread 2 tbls Dijon mustard over the top and put in the oven for 20-25 minutes. Check after 15 minutes. Internal temperature should be 140 for medium. Remove to a carving board and tent with foil.  In the same pan (remember the handle will be hot) add 1 tbls butter and 2 tbls finely diced shallot. Cook until the shallot softens then deglaze the pan with 2 oz. chicken stock. Cook down for a minute. Slice the meat into 1/2 inch slices.

To serve, pour half of the blueberry/balsamic sauce on the bottom of the serving piece then arrange the sliced meat on top.  Add the shallot mixture to the remaining blueberry/balsamic sauce and any accumulated juices from the sliced tenderloin. Reheat the sauce and pour over the tenderloin slices just before serving.

Yummm!


Friday, September 5, 2014

Flaky Sweet Pastry - So Simple Even a Child...

I can't claim to have mastered pastry although I take stabs at it now and then, only to prove I need more practice.  Recently, I encountered a young pastry chef from South Africa in a tiny resort town in the mountains of North Carolina.  Carla has top training and had worked in some fine resorts and clubs.  Now, she's set up shop on Hwy 107 in Cashiers, N.C. in a tiny kitchen outfitted with an Aga stove and producing some exquisite confections. I'd sampled enough of her flaky bottomed tarts to know this was the guru to show me the way.  She shared her simple recipe and pared it down for 4 pie size discs. I found it was still a bit much for my food processor to handle but it got it done.  It's really about keeping everything cold and being efficient when you roll out the cold dough.  I still need practice but it does produce a lovely tender pate sucre.  Omit the sugar and you have pate bris`ee.

True to training, Carla gave me the measurements in pounds and ounces. Professionals weigh everything, but I converted the measurements to conventional measure for the home cook.

Now here are the tips.
  • Everything should be cold. I mix the dry ingredients in a plastic bag and put them in the freezer for 20 minutes.
  •  Cube the butter then put it in a bowl and back in the refrigerator until ready to use.
  • If you have a stone or marble surface, chill it with a rimmed baking sheet covered with ice for 20 minutes. It doesn't hurt to do same to any surface you plan to work dough on. Lucky you if you have a well seasoned pastry cloth and if you do, you don't need me.
  • Chill the rolling pin, then flour it.
  • Chill the cooking tin or pie plate and after the dough is applied, chill 10 minutes before baking
  • Roll dough out from the center to make it circular. It won't be perfect. 

For 2 crusts:

1 1/4 cups all purpose flour
1 1/4 cups cake flour
2 sticks + 1 tbls  cold unsalted butter, cut into cubes
1 1/4 tsp salt
1 1/4 tsp sugar
3 oz ice water

Mix the flour, salt and sugar with a few pulses in a food processor.  Add the butter and pulse until until the mixture is small pea size ( about 15 pulses).  Add the ice water through the feed tube with the processor on and process just until the dough forms a ball.  Remove the dough and wrap in plastic. Chill for 1 hour or more before rolling out on a floured surface.  If baking blind, prick the bottom with a fork and weigh with dried beans or pie weights on parchment paper.  Bake according to your recipe.

Saturday, August 30, 2014

The Best Ingredients Make the Best Food

"Carpe Diem", is Latin for "seize the moment" and now is the time to do it if you want great,  ingredients in your meals or pantry. Summer's bounty of fruits and vegetables is at it's peak and I'm in a frenzy making Marinara, pickles, fig jam; freezing peaches and corn, blanching shelled peas for use during the colder months. Even though it's a good bit of labor, I take great satisfaction in pulling a jar of homemade Marinara sauce from the pantry in January. I feel dizzy when I visit the farmer's markets and can't decide what to choose it's all so exciting.

Now is the time to make fresh peach tarts, pepper jelly, creamed corn, gumbo or succotash with fresh okra, watermelon salad, basil pesto, tomato jam, butter beans swimming in buttery broth, pizza dressed with fig, prosciutto and goat cheese.  I know the pears, apples and pecans are coming but they are just beyond the summer limits and an introduction to the next season. I'll concentrate on baking in the winter. Right now, no other time of year has as much variety to offer as August.

Every cooking guru will always advise to use the best quality you can get and it does make a difference.  The best example I can think of is a simple vinaigrette.  Try the difference between cheaper quality olive oil and vinegar and "gourmet" brands such as Oli & Ve.  I've tried every sort of vinegar to make many varieties of vinaigrette but husband loves their Blenheim Apricot white balsamic best. It's like night and day to your salad.  I'm not really a food snob and I know we all can't afford too many pricey items but the variety of fresh ingredients available right now leave me no choice but to load up and use every peak moment for the best meals of the year.

We've had a good summer east of the Mississippi but not so for the West and I'm worried what that will do to the price of groceries in the coming months.  That's why a little effort now will help you out later.  So don't wait, grab a box of tomatoes now and get to work on the Marinara, you'll thank yourself in January.

Sunday, August 24, 2014

The Best Vidalia Onion Pie - With a Cheddar Crust

I've never forgotten the exceptional Vidalia Onion Pie I had at a party some 10 years ago.  I thought I'd never get that recipe until I found out a friend had it all along when she produced it at a dinner party last weekend.  It's surprisingly easy and holds it's shape when cut.  You could even omit the crust and bake in a baking dish sprayed with cooking spray.  Makes a great summer side dish for barbecue, grilled chops or stand alone lunch.

For the crust:

1 cup all purpose flour, chilled
6 tbls unsalted butter cut into small cubes and put in freezer for 15 minutes
1 cup coarse grated sharp cheedar cheese, chilled (white or yellow)
1 pinch salt
2 tbls ice water

In a food processor add the flour, butter and cheese and process for 15 seconds until the mixture resembles small peas.  The add the ice water through the feed tube. Process until the mixture forms a ball.  Remove and flatten the dough into a 6 inch round.  Wrap in plastic wrap and refrigerate for 1 hour.  Roll out onto a floured surface with a floured rolling pin into a 12 inch round. Roll the dough around the rolling pin and transfer to a pie plate. Gentley press into the pie plate, trim and crimp the edges.  Refrigerate 15 minutes.

For the filling:

2 lbs Vidaliah onions sliced very thin
1 stick unsalted butter
3 eggs beaten
1 cup sour cream
1/4 tsp salt
1/2 tsp white pepper
1/4 tsp nutmeg
1/2 tsp Tabasco

saute onions until soft and cool slightly.
Beat eggs then add sour cream and seasonings and mix.  Add onions and blend all together then pour into pie shell.

Preheat oven to 450 degrees and bake pie for 20 minutes. Remove and top with 1/2 cup grated Parmesan cheese then continue to bake 20 more minutes at 325 degrees. Let cool 15 minutes before serving.  Done when a knife comes out clean when put in the center of the pie. Freezes well.

Thursday, August 14, 2014

Simona's Bolognese

I hadn't been to Italy in 41 years but we just returned from a trip through Tuscany, Florence and Rome and I'm stoked on pasta, pecorino, and Prada.  Since my last visit, touring Tuscany has come into vogue With it 's rustic, satisfying, vibrant foods.  I enjoyed whole grilled fish, pizza Napola , osso buco and tagliatelle with bolognese sauce among the many delicious meals.

I decided to pursue the bolognese sauce for this blog because I really never understood it's difference from a tomato before.  I grew up on "spaghetti" sauce which was a combination of meat and tomato sauce.  In Italy pasta comes with a variety of tomato  or cream sauces but bolognese is where the meat comes in and meat means, beef or beef and pork.

I asked one of our guides, Simona, about her sauce and she was very clear; onion, celery, carrot, finely ground meat, tomato, red wine and a little seasoning.  She added pork in the winter. NO garlic!
A similar version was discussed with serveral restauraters - onion, celery, carrot, meat, tomato, wine and no garlic; then cook it down for a long time.  I just couldn't resist the garlic.

I've tried to recreate what I had in a charming restaurant off the Via Veneto in Rome but I've still got work to do on the texture.  Italian bolognese has a fine texture so whirling in a processor recreates the proper texture or a heart to heart with your butcher may help.  It is important all the ingredients must be fine.  The best way I found is to process the the sauce in batches for a short time (20 seconds) in a food processor. Not like baby food but a thick and hearty sauce that easily clings to pasta.

2 tbls olive oil
1 cup minced yellow onion
1/2 cup shredded carrot
1/2 cup minced celery
1 tbls minced garlic clove
1 lb ground beef
1/2 lb ground pork
4oz pancetta diced
1/2 cup whole milk
1 cup beef stock
1 cup red wine
3 tbls tomato paste
1 28 oz can San Mazano tomatos,chopped
1 tsp dried thyme
1 tsp dried basil
2 tsp Kosher salt
1 tsp pepper

In a large, heavy dutch oven, heat the olive oil over medium heat add the pancetta and cook until fat renders but not quite brown. Add the next three ingredients and cook 4 to 5 minutes until soft. Add the garlic, thyme, basil, 1 tsp salt and 1/2 tsp pepper.  Add meat and cook until all the pink is gone. Spoon off excess fat and liquid.  Add tomato paste and milk and cook until most of the liquid is absorbed, then add the stock and wine and bring to a simmer. Add the tomatoes and chop up the tomatoes with kitchen shears. Season with remaining salt and pepper and cook down on medium low, stirring frequently for 45 minutes.  Process in two batches for 15-20 seconds and reheat.  Serve over pappardelle or your favorite pasta and garnish with parmesan.

Monday, July 21, 2014

Blueberry Scones and the Baseball Moms

The very first recipe I posted on this blog was from Debbie, one of the group of friends I affectionately call the "Baseball Moms."  We bonded some 26 years ago watching ours sons play Little League and on through high school. About 14 years ago, Debbie invited a few of us on a weekend retreat to her place in the North Carolina mountains. It took me back to the giggly spend-the-night parties of my youth and this adult "girl" trip became an annual ritual.  When my husband asked me what we do, I said "NOTHING" - except sleep, eat, drink and talk until our jaws are sore.  We sleep late, drink coffee and eat a bit in our robes until noon, wander through the local shops, eat lunch out, drink a little wine or beer, eat dinner and stay up late talking.  We've shared the joys & sorrows; the ups & downs and so forth but the point is, we pause for 48 hours, escape our usual responsibilities and let our hair down. It's an essential event for me and contributes to my security and well being.

I brought along some blueberry scones to go with our lazy mornings.  They are England's version of a biscuit and are most often associated with afternoon tea but they are just as delicious with coffee.  Made with butter and a little sugar, they are less sweet than a blueberry muffin but sweeter than a traditional biscuit.

Preheat oven to 375 degrees and line a baking sheet with parchment paper

1 1/2 cups all purpose flour
1/2 cup cake flour
3 tbls sugar
2 1/2 tsp baking powder
3/4 tsp salt
1 stick cold unsalted butter, cut into pieces
1  cup washed and dried blueberries
1/2 cup buttermilk
1 large egg
1/2 tsp vanilla

Wisk dry ingredients together. Add cold butter and cut in with a pastry cutter or use clean hands.  Add blueberries. Stir into dry ingredients and mix with a fork until just blended.  Mix buttermilk, egg and vanilla together. Turn dough onto a lightly floured surace and knead a few times. Pat into a 1 inch round. Wrap in plastic and chill 15 minutes. Cut into 12 wedges and bake 22 minutes. Cool on a wire rack.


Saturday, July 12, 2014

Ultimate Tomato Sandwich with Basil Aioli

It's prime tomato season and I was thinking I'd make myself a really nice juicy tomato sandwich for lunch but all I had in the kitchen were the tomatoes; ripe Pink Ladies with wonderful flavor.  Since it's farmers' market day, I headed over there to collect the rest of the ingredients and got inspired.  I wanted a great tomato sandwich with the best ingredients available.  On market day, I can buy both farm fresh produce, artisnal baked goods, charcuterie, cheese and dairy.  I know the classic tomato sandwich is made with white bread but I dodged that with H&F Bread's "Southern Sandwich Bread".  They must have read my mind.  Grocery store white bread is too gummy and frankly, beneath my dignity.  Their's has a bit more egg, an even texture with a glossy crust and is cut in about half inch slices.  Perfect for sandwiches.  I also purchased Pine Street applewood smoked bacon.  It's my favorite with the right mix of smoke and sliced thick enough but not where you can't bite through it.  It crisps up nicely, too.  I picked up fresh Arugula and couldn't resist a nice bunch of basil.  I had homemade mayo in mind and then got carried away - basil aioli.

  The real mark of a good tomato sandwich is the tomato.  They should have plenty of red juicy flesh and the skin should peel off with little effort from the knife.  Tomato sandwich etiquette allows for tomato juices and mayo to mingle and run down the side of your hand and just below the wrist before you lick it off. Tell your mama I said it was OK
, it's just too good to waste.

For the Basil Aioli, in a food processor:

3 large egg yolks
1 tsp Dijon mustard
1/2 tsp white pepper
2 large garlic cloves minced
1 tsp white wine vinegar
1 tsp lemon juice

Process all ingredients for 1 minute

Add 3/4 cup olive oil through the feed tube.

Process until thickened, about 2 minutes

Add 8-10 large basil leaves and pulse 12 times the process 30 seconds.

Keep covered and refrigerated until ready to use.

Saturday, July 5, 2014

Sweet Cherry Cobbler on the 4th of July

  The Viet Namiese manicurists looked at my hands and gave me that "What have you been doing?" look. I had trouble making her understand I had spent quite a bit of time pitting several pounds of fresh cherries for a cobbler. I invested in a cherry pitter a few years ago and put it to work for my favorite cobbler.  Pitting cherries is a bit messy but a labor of love. It's got to be better than cleaning fish and I can never resist a fresh fruit in season (frozen works just fine if you're saner than me). Boy, was this a hit! Big sweet, juicy cherries baked in a batter that crusts up and browns with the chewy top and corners paired with vanilla ice cream.  Everyone from my 90+ parents to my 21 month old grandson loved every bite.  It's moments like these you wish you could bottle.

Happy Birthday America!!

3 cups cherries

1 stick unsalted butter
1 cup self rising flour
1 cup sugar
1 cup whole milk
1 tsp cinnamon

Preheat oven to 350 degrees

Place the stick of butter in a 9x12 baking dish while the oven heats and let it melt.  In the meantime, mix the flour, sugar, milk and cinnamon together until smooth.  Remove the baking dish as soon as the butter is melted and pour the batter into the melted butter.  Do not stir!!  Spoon the fruit over the butter and batter but do not stir!! Return to the oven and bake for 45 minutes until golden and bubbly.

Serve warm or at room temperature with vanilla ice cream.
 

Tuesday, July 1, 2014

Summer Vegetable and Cornbread Bake

Ah, those one pot wonders are handy on a weary work day.  This is a nice way to take advantage of summer's bounty without much effort and it's a vegetarian alternative if you're so inclined or just want a lighter meal. Much earlier in my marriage, we decided we would have one meatless meal a week to economize.  It turned out to be a lot more work and not much savings since I had a husband and two hungry boys to feed. I always seemed to turn out mac n' cheese, succotash and black eyed peas with rice (known as Hoppin John).  Things have calmed down around here but a meatless meal is still not a bad idea, especially during the summer.

I was tired and wandering around the grocery waiting for inspiration - nothing struck in the meat department or anywhere, so I went to the magazines and thumbed through an issue of Cooks Illustrated's Summer Favorites.  This is my spin on something I saw that turned out to be an easy pleaser if you don't mind a little chopping. I did use fresh corn, but frozen may be used.

Preheat oven to 400 degrees

In a large heavy skillet heat:
2 tbls canola oil

Add:

1 cup chopped onion
2 cups diced poblano(seeded)
1 red pepper diced
2 cups fresh white corn
2 cups zucchini chopped
1 tbls minced garlic

Cook over medium heat stirring frequently until the vegetables start to soften the add:

1 tsp Kosher salt
1/2 tsp black pepper
1 tsp dry thyme
2 tbls chopped fresh parsley

Cook another few minutes and add:

1 20 oz can dice fire roasted tomatoes and juice

Combine and cook until just bubbly.  Turn off heat and sprinkle;

2 cups shredded Monterey Jack cheese

In a seperate bowl:

 mix 2 cups self rising corn meal mix
1 1/3 cups milk
1 large egg
1/4 canola oil

Spread cornbread mixture over vegetable mixture and bake in the oven for 20-25 minutes or until browned on top.


Sunday, June 22, 2014

Summerville Rice Perloo

While visiting my aunt in Charleston, South Carolina, I was anxious to retrieve the recipe for a dish my grandmother often made,  Rice Perloo (pronounced perlow).  Rice is the staple dish of the Low Country and was served at breakfast, lunch and dinner at my grandparents' house in Summerville, a picturesque town 25 miles inland from Charleston.  It is a versatile dish that can utilize seafood, vegetables, bacon and ham.  Perloo is a kin to other rice dishes like pilaf and paella and has its' heritage from the Mideast.

My grandparents where simple folk and my grandmother had to stretch a dollar during the Depression to feed a family of seven.  Her version was very simple.  Boil a ham, then use the broth to cook the rice in. She sauteed onion, added the rice and seasoned in with salt and pepper and then the chopped ham.  When we vacationed at the Isle of Palms, the recipe evolved to "Red Rice" with green pepper, celery, tomatoes and was seasoned with Worchester then shrimp was added.  That was a real fine meal after a day playing in the surf and building sand castles.

There was no written recipe with measurements.  My grandmother measured the correct amount of water for rice by sticking her finger in the pot to see if it reached the middle joint of her index finger.  She probably never owned measuring cups and spoons, just cooked by site and feel.  I'm pretty good at "guessing" measurements but not that good.  She managed to feed her family the best way she new and it always tasted fine to me.

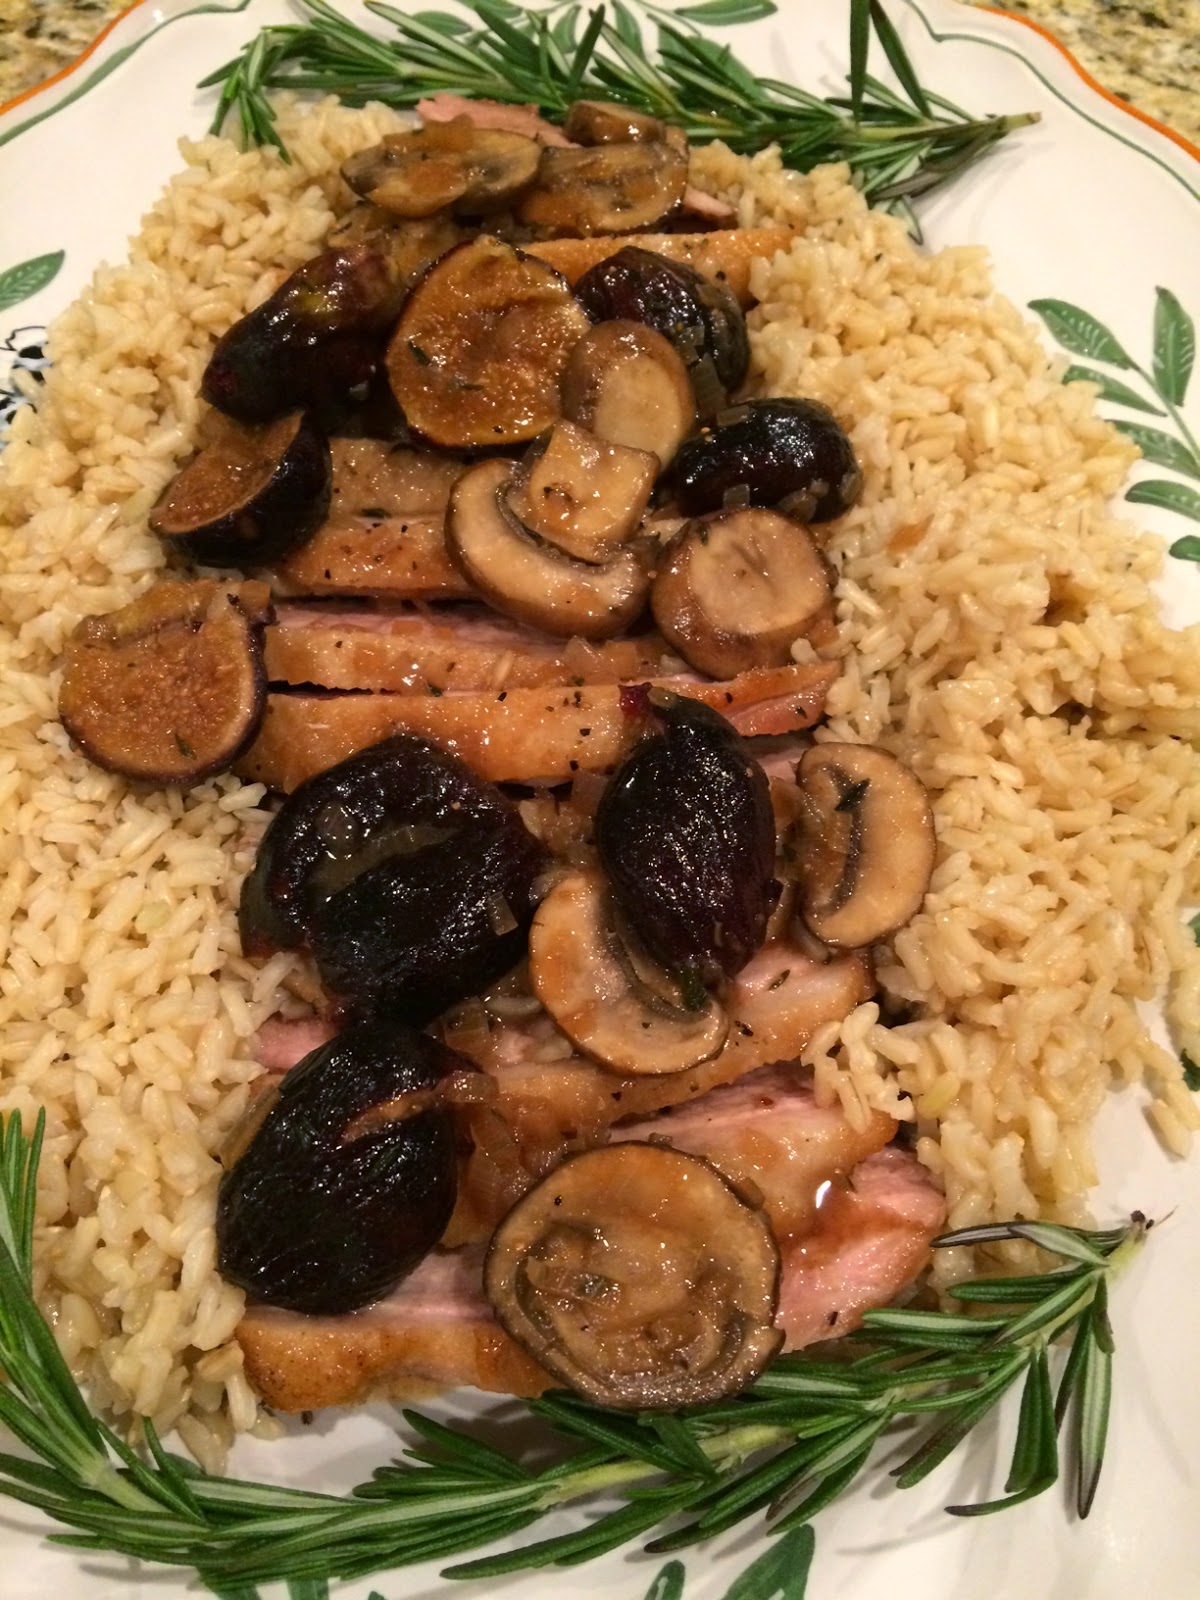
This isn't true to her method but I think she would enjoy it.  It's sooo good!

1 cup long grain white rice
1 cup water
1 cup chicken stock
1 tsp salt
1 tsp butter
Put all together in a pot and bring to a boil, cover and let cook until all the liquid is absorbed. About 25 minutes.

In a large skillet cook 2 slices of best thick cut bacon over medium heat until brown and all fat is rendered.  Remove bacon and reserve 1 tbls fat.

Add;
1 cup chopped onion
1/2 cup diced green pepper
1/2 cup  diced red pepper
1/2 cup chopped celery
Cook over medium heat stirring frequently until soft
Add :
1 tbls minced garlic and cook stirring frequently for 1 minute
Add:
1/2 tsp dried thyme
1/2 tsp smoked paprika
1 tsp Kosher salt
1/2 tsp pepper
Add:
Cooked rice and combine with vegetables and spice
Add:
1 20 oz can diced tomatoes
1 tbls tomato paste
Combine and bring to a simmer
Add:
Chopped cooked bacon and 1 cup ham (or 1 lb cleaned uncooked shrimp only at the last)
Add:
1 tbls Worcestershire Sauce
Tabasco to taste
Add:
1 Tbls chopped fresh parsley to finish

Cook 10 minutes over low heat until liquid is just absorbed(for shrimp, add at the last and cook until just pink)


Monday, June 16, 2014

Butter - Hell No, I Ain't Fergittin

When I was a child, the story was repeated to me a number of times by my great grandmother, grandmother and mother, How my great, great grandmother, widowed and pregnant with my great grand mother, begged the Yankee soldiers to leave her the spinning wheel and butter churn as they burned the house and the crops to the ground and confiscated the live stock. Was she just asking for anything in a chance to survive? It's the butter churn that bothered me. If they took the cows and live stock; no milk and consequently no butter. I began to wonder, if I where in the same position today, what would I ask them to spare?  My Cuisinart food processor, my Kitchen Aid Mixer, my exquisite collection of cast iron cookware, my Wusthof knives or just a spoon and a box of matches?

So it caught my attention in the booklet that came with my new Vita Mix, that butter was something you could make with this rather expensive apparatus. Well, like most, I buy butter at the grocery store but I remember as a child that crazy delicious sweet whipped butter that strangely appeared when my grandparents where around. How did that happen?

If you are a real cook, heavy cream finds its' way into your refrigerator and after you've used the tablespoon or two for a recipe, you have to figure out what to do with the rest.  So I poured some leftover cream into the Vita Mix and hit the button. Voila! Once it separates, whipped butter.  Strain off the liquid and add honey or whatever. Imagine the possibilities! I guess this might be the essence of what I like about cooking and this blog.  You CAN make things yourself that are better than store bought or restaurant food. It only take a few minutes before you can spread your butter on some warm toast or a muffin.  How easy can it be.

Monday, June 9, 2014

Oriental Brine

I had some fabulous grilled whole chicken at a pool side party recently and tracked down the brine that made this memorable.  I thought I'd like to do this on my rotisserie but if you don't have one, butterfly the chicken and put it directly on the grill grate over indirect heat.  This is enough brine for two whole chickens to be submerged. If you don't have a large container use a heavy duty garbage bag.  Be sure to keep those marinating chickens refrigerated (40 degrees F.) until ready to grill.  The sugar will make a dark skin, don't worry it's delish!

1 large sweet onion diced
1 cup celery diced
1 cup carrot diced
3/4 cup honey
1 1/2 cup soy sauce
1/2 cup hoisin sauce
 1 1/2 lbs brown sugar
1/3 cup salt
2 tsp grated fresh ginger
3 bay leaves
1 tbls juniper berries
1 tbls whole cloves
1 tbls black pepper corns
2 tsp chopped thyme
2 tsp parsley

Combine all ingredients in 6 cups water and bring to a boil.  Add 2 quarts ice water to cool. Submerge chickens and refrigerate for 48 hours.

Check cooked chickens internal temperature in the thickest part of the breast for 160 degrees. I tie my chickens with butchers twine but another check for doneness is to wiggle the drumstick