About Me

I have been cooking my way through life for over 50 years, beginning with mud pies as a child. I've turned a corner now and feel a Renaissance in my life. Recipes and Random Thoughts is my personal spin in a blog about how to prepare good food and how it prepares you for life. I want to share with you, honest to goodness food punctuated with perspective from the special memories and moments that have marked my journey.

Wednesday, June 10, 2020

Magical Morels

Dried Morels
Some of my family thought of a clever gift for my birthday. I received some dried morels.  Morels are a prized, wild grown type of mushroom.  They are not farmed and someone has to go looking for them in the woods in the spring in North America which makes them a bit pricey but it doesn't take many to make an impact.  Their meaty texture and earthy, nutty flavor add depth to any dish they are used in.  As a bonus, they are highly nutritious, packed with vitamins, minerals and antioxidants.  I knew immediately I wanted to pair them with pasta.  This is a free form recipe you need to imagine for yourself.  I'm just listing what I used as a guideline.  Morels and pasta with olive oil and garlic make a fine meal in themselves.

Begin by rehydrating the morels.  Put them in a bowl and cover with very warm water (not boiling). Allow them to sit 20-30 minutes and drain.  Another quick rinse will insure all sand or particulate matter has been removed.  Place them on a clean kitchen cloth to drain while you prepare the other ingredients.

I chopped prosciutto, garlic and grated fresh parmesan. One of the home made condiments I keep in my refrigerator is gremolada (parsley, garlic and lemon zest) so I added that too.  I cooked my fresh pasta and reserved one cup of the cooking water.  I sautéd the prosciutto in olive oil, then the garlic of about 30 seconds.  Added the chopped morels and let them cook two minutes.  Then I added the fresh pasta to the pan tossing all the ingredients together.  Then I added half the cooking liquid and a generous amount of parmesan, tossing until creamy.  If you like add some cream at this point or more liquid if necessary.  Serve and garnish with gremolada or chopped basil.

Sunday, May 31, 2020

Caramel Candy Corn

Addictive.  That's all there is to it.  Sweet, salty and crunchy and "you can't eat just one."  As a matter of fact it's nearly impossible to stop until it's all gone.  I had a friend's birthday occasion to prepare a "treat" and this hit the spot.  It calls for a bit of attention to detail but well worth it.  This is Stella Parks' version of Cracker Jacks from Bravetart. She is always pitch perfect.
No substitutions, please!  Investing a digital thermometer is a must for best results.

2 tbls refined coconut oil(or neutral oil)
1/4 cup yellow popping corn kernels(Orville, of course)
1/3 cup water
1/3 cup light corn syrup
3 tbls unsalted butter
1 1/4 cup sugar
1 tsp kosher salt (Diamond Crystal preferred)
3/4 tsp baking soda
3/4 cup salted dry roasted peanuts

Pop the corn;

Put oil in a 5 quart stainless steel pot over medium heat.  Add 4 corn kernels and wait until they pop, then remove.  Add remaining kernels, cover the pot and shake to coat with oil.  Continue cooking and shaking until the noise subsides and corn has fully popped, 2-3 minutes.  remove from heat and let stand, uncovered, until the steam subsides, about 5 minutes.

Remove the popped corn into a gallon zip lock bag, and wipe the pot clean with a paper towel.  The oil residue  will make it a perfectly greased container for candy making.  Return the popped corn to the pot and save the zip lock bag.  Adjust oven rack to lower-middle position, heat to 170 degrees, and place popcorn inside to keep warm; this will ensure a thin even candy coating.

Make the candy coating:

Combine water, corn syrup, butter, and sugar in a 3 quart stainless steel pot over medium heat, and stir with a fork until bubbling, about 4 minutes.  Increase to medium high  and clip on a digital thermometer or hold one carefully in the syrup, and cook, without stirring, until the clear syrup develops a toffee color and registers 345 degrees. Swirl the pan carefully if the syrup starts to color unevenly. Remove from heat immediately.

Cover a baking sheet with parchment paper or silicone mat (or grease).  Measure salt and baking soda into one ramekin and peanuts in another.  As soon as the syrup is removed from heat, stir in the salt and baking soda with a heat resistant spatula.  Once it begins to foam, add peanuts and stir until well coated.

Immediately pour over warm popcorn  and fold until well coated.  Scrape onto the prepared baking sheet, pulling chunks of pop corn into bite-sized clusters with pair of forks.  Cool until the candy shell is hard and crisp, about 45 minutes

Transfer popcorn to the zip lock bag and stir for up to 2 weeks at room temperature.  Make 9 - cup portions.

Wednesday, April 15, 2020

A Make Do Easter

Sort of Soufflé
We made the decision to retreat to the remoteness of the North Carolina mountains during the pandemic.  We would be more than 6 feet apart from others, in fact we'd be miles from the next human or store carrying supplies.  We packed like we were going on safari but for how long, we couldn't tell.  Sooner or later we'd have to emerge into civilization.  I'm a pretty good meal planner and I had an outline of menu mix and match ideas but sparse on the extras like snacks and sweets.   We didn't have time or room for such luxury.

We've gotten along quite well so far but today is Easter and it's dreary and rainy.  There's no family and no feast. I'm trying to make it festive but it's a stretch. Alcohol may have to take up the slack.  I made up a few basic deviled eggs and then stared at the sparse leftover odds and ends in the pantry.  I usually make something elaborate or bunny cakes for the grandchildren but we are apart this year so I watched them via FaceTime discover their Easter baskets.

With no sugar or flour it's a stretch to come up with a dessert.  Eggs, milk and some ancient hot chocolate mix would have to do to make up a sort of soufflé .  I'm not sure wether it's inspiration or desperation but it will have to do.


Friday, April 10, 2020

Lemon Posset

Spring is the perfect time for the lucious English classic lemon dessert with clear citrus flavors. This is about as easy to make as it gets.  Only four ingredients and little active time.

2 cups heavy cream
2/3 cup sugar
1 tbls grated lemon zest
6 tbls lemon juice

In a medium sauce pan combine the cream, sugar and zest.  Heat over medium and stir to combine and occasionally as it cooks.  Bring to a gentle boil ( do not let it boil over) and reduce to exactly 2 cups.  If it starts to boil over remove from heat briefly. Cooking time 8-12 minutes.  Off heat, stir in the lemon juice.  Allow to cool 20 minutes.  A skin should form.  Strain through a fine mesh strainer to a measuring cup and discard the zest. Pour equal amounts into 6 ramekins, then chill at least 3 hours.  Let sit at room temperature 10 minutes before serving.  Garnish with fresh berries.

Sunday, March 29, 2020

Waste Not, Want Not Soup

I've got plenty of food, in fact too much. Social distancing doesn't lend to sharing so much and with time on my hands I need to turn those leftovers that won't go away into something that will freeze or preserve.  Based on my post, Cold Zucchini Soup from the Union Square Cafe, I added to the zucchini and onion, the left over half head of cabbage from Colocannon of St. Patricks Day and the gremolata I used with Provencal Vegetable soup. The cabbage adds an earthy touch and boy, does gremolata pack some flavor!  Soup is a great way to use up leftover vegetables and gremolata or pesto makes great use of herbs that are so perishable.  I've quick-pickled onions, carrots and radishes to add to salads and made simple syrups with lemons and ginger to cut down on waste.  There are really many easy and useful ways to put what you have to good use and avoid the boring repetition of leftovers.  Get creative!  BTW, I used my high speed blender for this soup.

For the soup

4 cups cabbage, sliced thin
2 cups onion diced
2 cups shredded zucchini
3 tbls olive oil
pinch crushed red pepper flakes
salt & pepper
4 cups chicken stock
1/4 cup cream (optional)

For the gremolata

1 small bunch flat leaf Italian parsley, trimmed
2 cloves garlic chopped
1 tsp chopped lemon peel (preserved if you have it)
olive oil

In a large skillet with straight sides, heat the oil over medium heat until it shimmers.  Add the cabbage and onion and toss to coat with oil.  Reduce the heat and continue to cook stirring occasionally until the vegetables are wilted but do not brown.  Season generously with salt and add the red pepper flakes.  Grate the zucchini and add to the cooked vegetables.  When the zucchini has softened, cut the heat and allow the vegetables to cool for 10 minutes.  Add the vegetables to the blender and purée.  Add half the chicken stock slowly.  Don't fill up to the top, just half way.  Wipe out the skillet and return the purée then add the rest of the stock.  Correct the seasoning and add the cream if you like.

Put the parsley, garlic and lemon peel in the bowl of a food processor and pulse 5-6 times to break down the parsley.  Then stream in about 1/2 cup olive oil or more with the processor running until a paste is formed.  Scrape down the sides as necessary.  Gremolata can also be made simply by finely chopping the ingredients with a sharpe knife and mixing in the oil.

Swirl in the gremolata to the soup or serve separately to taste.  I like to finish this soup with a drizzle of truffle oil and sourdough croutons.


Monday, March 23, 2020

Pandemic Pizza

Image result for pizza
At last, I've got everybody where I want them.  At home, in the kitchen, cooking for themselves and their family.  There's no excuse, the restaurants are closed.  I was actually glad to see there was no flour left on the shelves.  That means you think you might need to make something yourself instead of eating processed, packaged foods.  I'm having a blast using all my kitchen toys, the bread machine, the multifunction cooker, the vacuum sealer, the sous vide and the usual pots and pans.  Most of what I see on the food web sites are quick and easy, one pot dishes, which is fine.  We may all put on a few pounds with these high carb pantry recipes but there's a time and place for everything and this is that time.  So don't panic - eat pizza!  Just think of our Italian friends.  Let's empathize and make a great homemade pizza and STAY HOME.

2 1/2 cups all purpose flour
2 tsp sugar
1 1/4 tsp fine sea salt
1 cup water @ 100 degrees
1/2 tsp instant yeast

Combine the flour, sugar and salt.  Dissolve the yeast in the water for 5 minutes then add to the dry mixture.  Knead by hand for 5 minutes until the dough forms a smooth elastic ball.  Lightly oil a bowl and put the dough in then cover with plastic wrap sprayed with baking spray (or a bit of oil).  Allow to rise 1-2 hours until dough is double in size.

Preheat the oven to 500 degrees for 1 hour.  If you have a pizza stone put it in while the oven preheats.

In the mean time, prepare the sauce.

28 oz can of peeled tomatoes (scrape out the seeds if you prefer)
2 cloves of garlic
2 tbls olive oil
salt to taste
 1 tsp sugar
small pinch of crushed red pepper flakes

Combine in a blender until smooth, then strain.  You can reduce the sauce over heat if you want it thicker.

Once the dough has doubled in size dump it out onto a surface lightly dusted with half flour, half corn meal.  Divide it in half and shape each half into a taught ball by moving the dough in a circular pattern between your cupped hands.  Keep tucking the bottom under.  Place the dough on a floured baking sheet or covered in parchment paper and cover with plastic wrap sprayed lightly with cooking spray to keep it from sticking.  Let the dough rest for 30 minutes covered.

Shape one ball of dough at a time into a 10-12 inch circle.  Flatten with your fist, then drape over your knuckles and carefully stretch and turn the dough until it's the right diameter.  Place on a pizza peel, ladle on a thin layer of sauce spreading in a circular pattern within 1 inch of the dough's edge.  Top with mozzarellas and your favorite toppings.  Slide onto the pizza stone or onto a hot baking sheet for 10 minutes then broil for 1 minute, watching carefully.  Remove from the oven and brush the edges of the crust with:

1/2 cup olive oil that has been heated with 2 cloves of slice garlic cloves and a pinch of crushed red pepper then strained.


Sunday, March 15, 2020

Irish White Soda Scones

I've dreamed of attending Ballymaloe Cooking School in Ireland for years.  I've been charmed by Ireland and found the food outstanding, some of the freshest and best I've ever tasted.  I've published Brown Irish Soda Bread and Colcannon previously in honor of St. Patrick's Day so I have searched the Ballymaloe Cookbook for something new and simple.  I settled on these delicious scones for breakfast or tea.  They are a quick bread relying on baking soda as the leavening agent and it's reaction with buttermilk to form lactic acid, best served warm the day they are made.  Soda bread only takes minutes to make and has endless variations.  So add dried fruit or herbs if that suites you but be sure to serve with lots of rich Irish butter.

Preheat oven to 475 degrees.  Line a baking sheet with parchment paper.

4 cups all-purpose unbleached flour
1 tsp kosher salt
1 tsp baking soda
1 3/4 cup buttermilk

Sift the dry ingredients.  Make a well in the center.  Pour in all of the buttermilk at once.  Using one hand, with your fingers stiff and outstretched like a claw, stir in a full circular movement from the center to the outside of the bowl in ever-increasing circles.   The dough should be softish, not too wet and sticky.  When it all comes together, turn it out onto a well-floured work surface.   Roll the dough out to 1 inch  and cut with a biscuit cutter or a knife.  Re-roll the excess and cut more.  Makes a dozen 2 inch scones. Bake 15-20 minutes until tops are golden.  Serve warm with butter and jam.

Just a note.  This dough can be shaped onto a single round loaf, cutting a deep cross in the middle and pricking the edges to""let the fairies out".  The Irish are a superstitious lot and in ancient times they couldn't understand the rise of the bread and assumed it was due to mischievous spirits or "fairies".  Their bread was marked with the cross to exorcise the mischief makers and make their humble bread safe to consume.


Wednesday, March 11, 2020

Slow Cooker Pork Stew with Baby Kale, Cannellini Beans and Orecchiette

Delicious Pork Stew
My kitchen is being painted and my cooking time and space are really pinched this week so I pulled out my multi-cooker and used its slower cook mode to create this cozy dish that has moist and tender meat with rich, satisfying flavor. Braising meat this way breaks down the toughest cuts with slow steady heat and not too much liquid. A sprinkle of grated cheese and some grilled sour dough round out this simple dish without too much fuss. The tender baby kale leaves are added when served so they aren't over cooked and give a bit of texture without the stonger flavor of mature kale.  Like many stews the flavor improves with time and this is an excellent choice for something to pull out of the freezer at the last minute.

Thin sliced baby kale
2 lbs boneless pork ribs trimmed of excess fat and cut into one inch cubes
1 peeled large onion cut in half through the root and sliced thin
1 trimmed fennel bulb sliced thin
6 whole garlic cloves
1 14 oz. can petit diced tomatoes with juices
1 16 oz. can cannellini beans
2 cups orecchiette pasta
1 cup water
1 sprig of fresh thyme
1 bay leaf
2 tsp ground cumin
1 tsp dried oregano
1 tsp coriander
1 tsp smoked paprika
salt & fresh ground pepper
2 cups fresh baby kale cut in thin strips

Put the garlic and sliced onion and fennel in the bottom of the slow cooker. Season the pork cubes with kosher salt and fresh ground pepper and place on top of the vegetables.  Sprinkle with the cumin,  oregano, coriander and paprika.  Add the can of diced tomatoes, 1 cup of water, sprig of thyme and bay leaf.  Cook on high for 2 hours.  The meat should be fork tender.  Skim off excess fat from the surface before adding the cannellini beans, with their liquid, and orecchiette. For a creamier texture, mash a cup of the beans before adding them to the broth.  Add salt to taste, it will take a good bit.  Reduce heat to warm, cover and cook another half hour.  To serve, put 1/2 cup loosely packed baby kale strips in the bottom of a soup bowl they ladle the stew over the kale.  Sprinkle with grated parmesan and serve.

Wednesday, March 4, 2020

Keep It Simple Salmon Cakes


Less is more for these delicious salmon cakes.  Stripped down to the essentials, they have just the right flavor and texture for a fish cake that holds together but tastes like salmon rather than filler.  A squeeze of lemon and some tartar sauce makes for a special meal.

1 and 1/4 pounds fresh salmon without skin, cut into 1 inch pieces
In 3 batches in a food processor, pulse the salmon into 1/4 inch pieces, about 2-4 pulses.  You don't want the pieces to be too small.  There should be some texture to the cakes.

3 tbls + 3/4 cup panko, divided
2 tbls mayonnaise
2 tbls finely chopped parsley
1 tbls finely chopped shallot
1 scallion sliced thin
4 tbls fresh lemon juice
1 tsp Dijon mustard
3/4 tsp salt
1/4 tsp pepper
dash of cayenne
1/2 cup canola oil

Combine the mayo, parsley, shallot, scallion, lemon juice, mustard, salt, pepper and cayenne.  Add 3 tbls panko then add the chopped salmon and mix well.

Using a 1/3 cup measure, scoop and pack the mixture and shape into patties.  Spread the remaining panko on a dinner plate.  Dredge the cakes in panko and shape into a disc about 1 inch deep.  Set aside on a parchment lined baking sheet.  After forming all the cakes, chill 15 minutes in the refrigerator.  Heat the oil in a 12 inch skillet over medium heat.  When the heat starts to shimmer, cook in batches 2 minutes a side.  Drain on paper towel and serve immediately.  If you need to hold them for a bit.  Move to a rack over baking sheet and leave in a warm oven until ready to serve.


Wednesday, February 26, 2020

Pickled Butter Radishes and Shallots

Do you know the French eat radishes on buttered bread with a sprinkle of flaked salt for a snack.  I found that remarkably different until a friend brought me a bunch of his" butter "radishes. It's winter and anything from the garden is a treasure and should be prepared with careful consideration. I guess this variety lends itself to the buttered bread idea as they are small and milder than the grocery store bunch.  I thought they'd be more useful to me as a pickled vegetable this time of year.
 Mixing them in with a salad for a tasty bite of crunch and piquant flavor is refreshing during these bleak winter months.  Any type of radish will do and it's a snap to make.

1 pound radishes, cleaned and trimmed of roots and stems, thinly sliced
2 large shallots, sliced thin
1 whole garlic clove
1 bay leaf
Pack into a pint glass jar

Combine the following in a nonreactive medium sauce pan and bring to a boil.
1 cup red wine vinegar
1/4 cup sugar
1 tbls sea salt
1 tsp. coriander seed
6 whole pepper corns

Cut the heat and let sit for 10 minutes.
Pour the hot brine liquid over the radishes and shallots in the jar.  Allow the mixture to cool before putting a lid on.  Store in the refrigerator for up to one month.


Wednesday, February 12, 2020

Elegant Lavender Shortbread

It was a total surprise when the waitress brought a small plate of lavender shortbread at the end of a great meal at Sachet Restaurant in Dallas. I loved the distinct but not overpowering taste of lavender.  I knew it had to be part of my Valentine plans and would make an elegant bite with a cup of tea.  It only takes 5 ingredients.

  •  Use salted European style butter, it works better for shortbread in this case.  
  •  Grind the dried lavender with a mortar and pestle so there are no large pieces or, I prefer, putting the sugar and lavender in a high speed blender to bring both to a fine texture.  The sugar blends in better too that way.
  • Keep the dough cold to prevent spreading while baking

2 tsp dried lavender ground fine
3/4 cup sugar
12 oz. salted European style butter at room temperature
1 tsp vanilla extract
3 1/2 cups all purpose flour

Put the softened butter, sugar and lavender in a standing mixer with the paddle attachment in place and mix on low speed until blended.  Add the vanilla and beat in.  Add the flour in four portions mixing well after each addition and the dough holds together.  Wrap dough in plastic and chill for one hour.

Pre heat the oven to 350 degrees. Place the dough between two sheets of parchment or plastic wrap and roll the dough to 1/2 inch thickness and cut into shapes.  Place on a cookie sheet lined with parchment paper.  Place the cookie sheet in the refrigerator for 10-15 minutes before placing in the oven for 20-25 minutes or until the edges turn light brown.  Remove from oven and cool completely on the cookie sheet.  Store in an air tight container.  Freezes well.
Makes 2-3 dozen.


Tuesday, January 28, 2020

Sourdough Bread, Did you know it has ears?

Sourdough Boule, the dark peaked edge is an "ear"
I'd resisted the thought of baking sourdough for years.  It's the Olympic Marathon of baking.  Was it necessary to my cooking repertoire?  I didn't think it was worth the effort of all that feeding a starter like it was a pet until I discovered a young chef by accident on YouTube, Joshua Weissman.  Remember the name, he's going places.  I watched all his videos noting he frequently uses a contraption called a proofing box or fermentation station.  A collapsible box with a heating element in the floor and a water pan.  It was the answer to my hesitation and expansion of my baking skills.  The proofing box allows you to set the precise temperature and humidity for any bread or fermentation recipe.  All that stuff about "cover with a damp cloth and set in a warm place" makes for very inconsistent results.  I do have a great bread machine but it only knows one temperature and I have no control over that.  Now I could control the proofing environment for professional results.  So what's just one more gadget in my already packed kitchen?

I studied Joshua's video, written schedule and techniques over and over.  I wasn't sure if it was a recipe or an IQ test.  It involves math, chemistry, vocabulary, logic, organization and above all else, a commitment.  Joshua made it as simple as he could but it's still got a lot of moving parts.  I'm not going to review the recipe but just give you the link and some tips for success.  The cookbook from the famous Tartine Bakery in San Francisco goes on for 80 pages  about sourdough. Joshua Weissman No Knead Sourdough Bread (13 minutes and 23 seconds) is more manageable.  https://youtu.be/eod5cUxAHRM

The Perfect Loaf website is another excellent source of baking wisdom.

scoring the loaf before baking
I admit to having all of these baking tools except the proofing box so I put them to good use.  Equipment is pretty important here so save up those pennies.  Baking is an investment.  Check out The Perfect Loaf website for more equipment.

-A Brød & Taylor proofer; a digital scale and an instant read thermometer (Amazon).  If you're into baking all of this will become indispensable.  So splurge.

-Use unbleached organic flours and filtered water.  It's a chemistry thing. I used a mix of rye and all purpose for the starter, bread flour and whole wheat for the dough.  Rice flour for dusting the liners.

-A razor blade will do for scoring but a lam (a razor blade with casing so you don't cut yourself) is better.

-A cast iron dutch oven.  I have an enameled one by Le Creuset.  Another splurge but worth it.

-A Kitchen Aid Mixer with a dough hook.  A big investment.  You can, of course, use your hands but how bourgeois.

-A banneton proofing basket.  It supports the bread shape as it rises.

Yes, this is the most expensive loaf of bread you could make so make a lot of them and think about all the history and effort that went into it when you do.  The starter can be used in any baking that involves a leavener.  Experiment and Bake on!


Tuesday, December 31, 2019

Reviving the Syllabub Dessert

Elegant syllabub
What a fabulous, frothy finish to our Christmas Eve meal!  Syllabub is the perfect balance of rich yet light.  Why has it been hiding in the attic so long? Dust this recipe off and rediscover a delightful treat. It made me think of eggnog as tiny champagne bubbles.  I remember my mother mentioning it as a American Colonial dessert but it really has its' roots in England, all the way back to the 16th century.

Several years ago, I went to a holiday party and syllabub was dessert.  I was wowed and interested the hosts were using a unique contraption to achieve the frothy consistency.  I finally got around to asking the details and my friend gladly shared her simple recipe and her antique syllabub pump.  It's so easy and delicious, I can't imagine why it isn't as popular as ice cream.  I noted  culinary authors, the Lee Brothers, share the same sentiment in their Charleston Kitchen cookbook.  That version is similar to James Beard's, which is a hand whipped item.  I guess they couldn't get their hands on one of these pumps.  They are only available as antiques and quite rare.  My friend's pump had been passed down through her family.


Syllabub pump
A bubbly drink of wine and milk became the word "syllabub".  Compounded from the words, Sille, a region in the Champagne area of France and the English slang word " bub", meaning a bubbly drink.  There are various versions,  commonly, using sherry and lemon peel, but this is the Deep South version and we prefer it made with Bourbon.  End of discussion.

Now the bigger problem is the tin pump.  They just don't exist anymore and I feel privileged to have been able to make Syllabub with a family heirloom.  It makes the dessert much more etherial.  Small pin size holes in the bottom of the pump express air through the mixture. Using a whisk is fine if that's all that's available but the results will be more whipped cream like, still a delightful creation.  I'm looking for a crafty person to make one. See the picture  and let me know if you have a source.

It's just 4 ingredients :

1 quart heavy cream
1 pint whole milk
1 cup sugar
1/2 cup bourbon

Mix until sugar dissolves then chill overnight.  Mixture must be very cold.  Stir before you begin to pump to insure the ingredients haven't settled.  Submerge pump and pump like mad (or whisk by hand).  Skim off the foam and serve in a compote with a spoon.  Serves a lot.

Thursday, November 28, 2019

Keep Your Eyes On the Pies

Chess
Apple

Pumpkin
Pecan


It's Thanksgiving and my eyes are on the pies.  My heart and stomach are full of thanks.  I'm counting my blessings and the pies.  Wishing everyone  a Happy Thanksgiving.🦃

Sunday, November 17, 2019

Pursuing the Perfect Pie Crust

spinach quiche
 The "perfect" pie crust that rolls out like a "dream", light, tender with a flaky bottom crust  is achievable with practice and attention to detail.  I don't make too many pies and never really settled on a single recipe until my cousin called and asked me to help her master her late mother-in-law's pie crust in time for Thanksgiving.  She had departed this world leaving behind two treasures; a sketch of a recipe and a well laminated pastry cloth.  When I heard that, I knew we were talking about a pie saint with a sacred recipe. She had baked each son's favorite pie for Thanksgiving with skillful ease and my cousin wanted to honor the tradition.  What I noticed as I dove in and reviewed the varieties I'd made before that included variables like egg, shortening, cream cheese and even vodka, was that they're leaving out a lot in the recipes and videos.  "Roll the dough out on a floured surface" is culinary malpractice.  That's like telling a passenger to land the plane at night.  Just look for the runway lights. Where's the instruction manual?
Double crust pie

More important than the ingredient mix is technique.  I've used a food processor to mix the dough before but realized that's for sissies.  Roll up those sleeves and use your hands.  Larger pieces of fat distributed throughout the dough still accomplish coating the flour with fat so not too much water is absorbed which makes for a sticky dough.  No matter the recipe, all ingredients and even the bowl need to be COLD and the dough throughly chilled before and after placing in the pie plate or tin.  It's a race of time vs temperature to cut, mix, knead and roll the dough before the fat becomes too warm.  According to the pastry goddess, Stella Parks, that perfect temperature is 68 degrees.  Any higher, and its back in the refrigerator for a chill down.  So keep an instant thermometer handy.

Rolling out the dough is tricky.  Here are some helpful tips;
  • pat the dough into a disc 5 inches in diameter.  That's about 15 oz per disc minimizing any fissures to the disc surface by smoothing the surface and edges.  A fissure will only enlarge with rolling and distort the circle.  
  • Pinch any cracks together with a moisten finger and dust with flour.  Wrap in plastic wrap. The plastic allows you to smooth edges without drag. Chill for at least 2 hrs before rolling out
  • unwrap and roll on a floured surface from the center to the edge making a quarter turn after each roll.  The dough should always slide and not stick on the floured work surface.
  • flip the dough over after you have completed 4 turns dusting the surfaces lightly with more flour and brushing away any excess on the dough surface.
  • use pyrex or quality pie tin for best results
  • for a nine inch pie plate, the rolled dough should measure 12+ inches in diameter
  • use a finger dipped in water to moisten any cracks and smooth. Dust again with flour 
  • a floured rolling pin sock discourages sticking to the pin
  • if at any time the dough gets too soft - back in the refrigerator for 10 minutes
  • either roll the dough over the rolling pin and into the pie plate or fold in quarters, center in the pie plate and unfold. Whatever works best for you.
  • adjust the dough so it falls naturally into the pie plate, never stretching the dough, making sure it fits into the bottom corners of the plate.
  • The dough should hang 1 1/4 inch over the edge. Trim to 1/2 inch and tuck under onto the top of the pie plate not inside the plate.  Crimp or flute as desired.
  • chill the crust again once the dough is fitted into the plate for single crust pies
  • to partially bake a crust, line with aluminum foil and fill with 2 pounds of dried beans or pie weights.  This will keep the crust from puffing and the dough from shrinking or sliding down the sides.  Remove the weighting and continue to bake as directed for a pre baked crust.  
  • pricking the crust is not necessary if pre-baking with pie weights.
  • bake on a preheated pizza stone
  • use bleached Gold Medal all purpose flour, it has a lower ph
flakey bottom crust

Now, for the recipe; all butter or a butter/shortening mix (lard if you can get it).  The hallmark of a good pie crust, for me, is a flaky bottom crust no matter the filling and both versions will deliver.  All butter is sturdy and has better flavor but butter/shortening has better texture.  For an all butter version, search Stella Park's All Butter Pie Crust.  It is brilliant, "easy" and intentionally cultivates gluten for a sturdy dough if you are making a lattice crust or tart shells.  Her method of folding and rolling the dough is as important as the recipe and worth watching her video.

2 Crust Butter/Shortening Pastry

2 cups or 275 grams all purpose flour
1 1/4 cups or 175 grams pastry or cake flour
1 tbls or 22 grams sugar
1 tsp or 2 grams salt
a pinch of baking powder *helps the crust expand for flakiness*
Apple pie sliced
14 tbls  or 200 grams unsalted American style butter
6 tbls or 72 grams shortening
1/4 cup ice water or 52 grams (add 1 or 2 tablespoons more if needed)
1 tbls white vinegar or 18 grams*this shortens the gluten strands*

Combine the flours, baking powder, salt and sugar in a medium bowl and whisk together 
Cut the butter and shortening into 1/2 inch cubes. Add to flour mixture and toss to coast each with flour.  Roughly smash each cube to flatten with your fingers.  Add the water and vinegar knead quickly to a shaggy mass then turn onto a floured work surface.  Continue to knead the dough until a cohesive mass forms.  Work quickly, handling the dough as little as possible. It should take no more than 1 1/2  to 2 minutes. Divide in two, form into discs and wrap in plastic.  Chill for at least two hours before rolling out.  See notes above.
If refrigerated overnight, set out for 10 minutes at room temperature before rolling.  Lasts in freezer 3 months.

A disclaimer: The above recipe is based on Chef Thomas Keller's ordinal in grams.  The weight conversion to Imperial is close.  I encourage all cooks to buy a digital scale for accurate baking.


Monday, September 2, 2019

Caramel Cake - Some Tips. It Takes Practice and Patience

Not perfect, but not bad
A first class caramel cake takes a great recipe, patience and practice.  I mastered caramel some time ago as a sauce or candy and cheated at icing by just adding powdered sugar to it.  My son's birthday is up so I decided it was time to roll up my sleeves, put on my big girl panties and make a real cooked caramel icing cake.  Caramel icing is something even the most accomplished cooks will tell you is a challenging feat.  It's about timing, temperature and technique plus good equipment.

 I've been looking at caramel cake recipes for years and never taking too many of them seriously.  I had in mind one I tasted years ago made by a lovely lady from Willacoochee, Georgia.  She passed away recently at 97 without making her secrets known.  Her cake was tender and moist and the icing was creamy, caramel sweetness perfection that clung to the cake in smooth elegance without any torn cake or visible crumbs .  I finally settled on trying the recipe in the Lee Bros. Charleston Kitchen cookbook (page 223) .  I focused so hard on the recipe and specific temperatures to cook and cool the caramel to, I didn't take too seriously how challenging icing the cake might be and there lies the technical issues and the art.  So here are some tips to make that cake survive.

Icing the cake on a cooling rack over a waxed paper covered baking sheet allows the slightly warm icing to flow over the cake layers and drool down onto the waxed paper.  It can be scraped up and reused as necessary with a little warm water whipped in.  After seating the second layer on top I began to realize the top layer was sliding off.  You can't just ease it back into place without the icing pulling away from the cake.  I started to panic but tilted the layers and the cake slid back to alignment.  This cake required on the spot thinking and that most don't.  Never had to do that before. More drooling icing over the top made it clear, you don't smooth this icing with a spatula or anything more than a finger dipped in warm water.  Any bumps generally relax to a smooth finish. It's very tricky business, so this is fair warning.  Make those layer even and don't do anything to pull the icing away from the cake.  Fix mistakes or smooth with a finger dipped in warm water.  Scrape up and reuse icing with a teaspoon of hot water beaten in.

When the icing has set, moving the cake from the rack to a pedestal is even trickier. Use two spatulas on each side in line with the top wiring on the racks grid. Shove them under the cake with conviction.  Once you there, it's no turning back.  Now lift, and move it quickly.  Don't try to pull them back out from under the cake until it's in place.

A cooked caramel cake is an art just as much as a fancy wedding cake or butter cream icing - this one just tastes the best to me.

Sunday, March 10, 2019

It's In the Details - Toasted Sugar

Note the contrast between toasted sugar and white
This is a blog only true foodies can appreciate.

Redistribute the sugar from the edges, and center to edge 
I've been house bound for a few days with a bug and finally feel well enough to do something in the kitchen - not much, just stir the pot at most.  While abed, I studied Stella Parks' BraveTart.  Her seminal tome on American iconic desserts which won a James Beard award.  Admittedly, I ordered this cookbook because of just one recipe which is her version of all butter crust which I haven't gotten around to yet but also spied the really weird title "Toasted Sugar".  As maligned as sugar is today, what good does it do to toast it, how, exactly, does one toast sugar?  It's a curious verb to apply to sugar.  You can dissolve, melt, burn, brûlée, spin or sprinkle sugar but how do you toast it?  The very form of granular sugar makes this a curious proposal but clever, culinary chemists think outside the box.  Cooking is always about time and temperature and it turns out if granulated sugar is baked at low temperature for a good length of time, it will change composition slightly.  It's color changes from white to tan and it takes on a more complex flavor and a little less sweetness but retains it's powdery form.  It's one of those subtleties that a more dedicated cook finds intriguing.  So given that I'm quite bored and caramel notes are among my favorite, I toasted sugar this afternoon.

 Toasted sugar can be used the same as its virgin kin but will provide more complex flavor to any recipe you choose to use it in.

Use only a pyrex or ceramic baking dish. No metal, they conduct heat differently.  Use only granulated white sugar not light or dark brown sugar.  They are a different animal that involves molasses.

4 pounds granulated white sugar
9x13 inch pyrex baking dish

Preheat oven to 300 degrees

Spread sugar in an even layer in the baking dish.

"Toast" in the oven for 3-5 hours depending on desired color, stirring the sugar every 30 minutes.  Be sure to stir the sugar away from the edges as the edges heat first and turn the center toward the edges, promoting even heating and releasing any steam.  The sugar should retain a powdery texture and be the color of sand.  If a few clumps develop, sift them out at the end.  Cool completely, stirring occasionally to release moisture.  Store in an air tight container.  Lasts for about a year.


Thursday, January 31, 2019

Winter Fresh Roasted Tomato Sauce

Ready to roast
Winter can be pretty bleak and so can the available tomatoes this time of year.  I generally avoid hydroponic and imported as nothing really replaces summers' homegrown variety, but let's face it, their only available for a very limited time.  I've found a very pleasant alternative for sauces in the form of oven roasted Roma tomatoes.  Roasted with shallot, garlic and thyme then drizzled with olive oil, sprinkled with Kosher salt and fresh cracked pepper coaxing a concentrated tomato sweetness out of mediocre tomatoes.  Straining the seeds out and salvaging any juices and flavorful jelly adds brightness to the sauce.  Once roasted, I pour everything into a blender with some fresh basil and give it a spin.  Works wonders and freezes well.
Strain juices & jelly from seeds


Fresh Pasta dressed with roasted tomato sauce
Add strained liquids to roasted tomatoes in blender
                                                                       3 lbs plum tomatoes, sliced, stem to end, cored, seeds strained and juices reserved and arrange on a baking sheet covered in parchment , season with Kosher salt, pepper, fresh thyme, 
Coarsely chop 2 large shallots and 2 garlic cloves and arrange in cavity of 
halved tomatoes. Drizzle liberally with olive oil.  Roast at 350 degrees for 45 minutes or until edges of tomatoes just turn brown.  I use a lower temperature so the garlic will not burn.  While roasting, press seeds and jelly through a strainer and reserve the juices, about 1/2 cup. 
Allow to cool 15 minutes , then pour tomatoes and accumulated juices into a blender or food processor.  Add 1 cup of packed basil, 1/4 cup olive oil, reserved juices and 2 tbls balsamic vinegar.  Process or pulse depending on desired consistency.  Freezes well. Makes about 1 quart.

Tuesday, January 1, 2019

5 Things That Will Make Anything Taste Better

As a newly wed, I couldn't figure out why my Mother's vegetables always tasted better than mine.  I later uncovered her secret of adding just a pinch of sugar to improve the taste of the bland squash and string beans we ate so often.  Learning to season is an art and too often we just rely on recipe measurements rather than our senses.  I'm often asked "how much do you ..." and my answer usually is "just taste it and see what it needs".  Over 45 years of cooking, I've decided there are 5 things that will make anything taste better.  The sad part is not one of them is deemed good for you but used judiciously, your food will taste better.

#1 Salt  Salt brings out the flavor in most anything.  Kosher is my choice when cooking but you should always use table salt when baking.  It's a matter of accurate measuring when it comes to volume.  It's the first thing I reach for when a dish needs flavor direction.  Salt has become popular and fashion conscious as it comes in a variety of colors and flavors based on its mineral content and where it comes from.  Fancy Pink Himalayan or Black Hawaiian are eye catchers on upscale menus.  Salted caramel and other sweets boasting a salty side have become very popular lately.  There's no way to get around salt except by choice.

#2 Sugar  How can something so good be so bad for you.  Sugar is on every medical and wellness hit list but it's fair to say sweets are an undeniable pleasure.  Why?  Two reasons; because we are primate descendants who ate fruit from trees and our taste buds only recognize salt, sweet, sour and bitter.
Glucose is the simplest form the cells of our body use for energy and that tells our brain it is a good thing.  Our genes have also predisposed us to interpret bitter as poisonous and sweet as safe to eat.

 Well, take a good thing and ruin it.  Things got out of hand with high fructose corn syrup, vending machines and so forth so I try to take this approach to sugar, use a pinch now and then like my Mother did to improve a bland food but if you're going to sin, sin BIG -  just not every day.  Save the ice cream and cake for birthdays but make it the best ice cream and cake anyone ever tasted.

#3  Butter  As Julia Child said, "don't be afraid of butter" or Paula Dean saying with a smile, "add more butter".  Butter has never ruined anything!  Somehow in the past, we got confused and misguided thinking margarine was an improvement.  Now we know the truth, butter is a sacred and holy thing.  Olive oil may be best for our hearts but nothing will replace butter in our hearts. When I complained of hunger before bedtime as a child, my parents had a simple remedy - bread and butter.  A great feast!

#4 Bacon  My parents loved bacon, ham and all forms of cured or smoked pork.  Regrettably, they deemed it necessary to eliminate most of it from their diets as the years went by.  At 90, it didn't seem to matter and they went back to bacon and eggs for breakfast every morning.  Hallelujah!  There are some benefits to old age.

Just yesterday, I innocently ordered a dish of tricked-up Hoppin John made with jalapeño and tempeh bacon.  I found out tempeh bacon is fermented soy beans!  Was the jalapeño suppose to disguise it.  Can't fool me.   I mean, what would a BLT be without the B?  I rest my case!

#5  Cheese  If you want to polish up your vegetables, grate some parmesan over them. Cheese is one of the most flexible ingredients at our disposal.  It comes in so many delightful forms I'd be hard pressed to name a favorite.  Who doesn't love a good grilled cheese.  What would pizza be without cheese? Pimento Cheese and mac 'n cheese are part of the basic food pyramid in the South.  Cheese is served as a final course in France instead of dessert.  I'm telling you, cheese is as important to culture as it is to diet.  Nobody's certain when making cheese got started but it seems to have been a way of preserving milk in Europe, Mid East and Asia.  Then cheese snuck it's way into our American hearts via cottage cheese and Velveta and now it's sophisticated, imported and artisanal.

                                                      **************************

An all-American favorite meal is a bacon/cheese hamburger, French Fries and a milk shake.  It covers  all if the bases if the bun is buttered.  I didn't say it was healthy, just popular because it taste better than a quinoa, Kimchi, roasted chickpea grain bowl with a Sriracha finish.  Just imagine what a little cheese and bacon could do for that.

Ok, the next blog will be a grain bowl.


Sunday, December 30, 2018

Star Brioche

I know Christmas is over but I was so busy making these, I didn't have time to post this.  It's a wonderful Christmas morning baked good or any time brunch item.  I cranked out quite a few as gifts and they make for "WOW" impression.  My hairdresser said he had to sit down he was so thrilled.  They can be filled with either cinnamon/sugar, Nutella, fruit jam, lemon curd or cheese.  If wrapped well, they freeze nicely too.

My big secret is I have a bread machine to make the dough in. It's a time saver and makes for a consistent dough with the right environment for the dough to rise in.  While there is a heating element in the machine which enables baking, I always prefer baking in a conventional oven.  I used the  1 1/2 pound recipe for brioche from Fleishmans's Breadworld and use the dough setting on the machine.

The recipe calls for bread flour but it can be made with all purpose flour successfully.  All purpose doesn't rise as much.

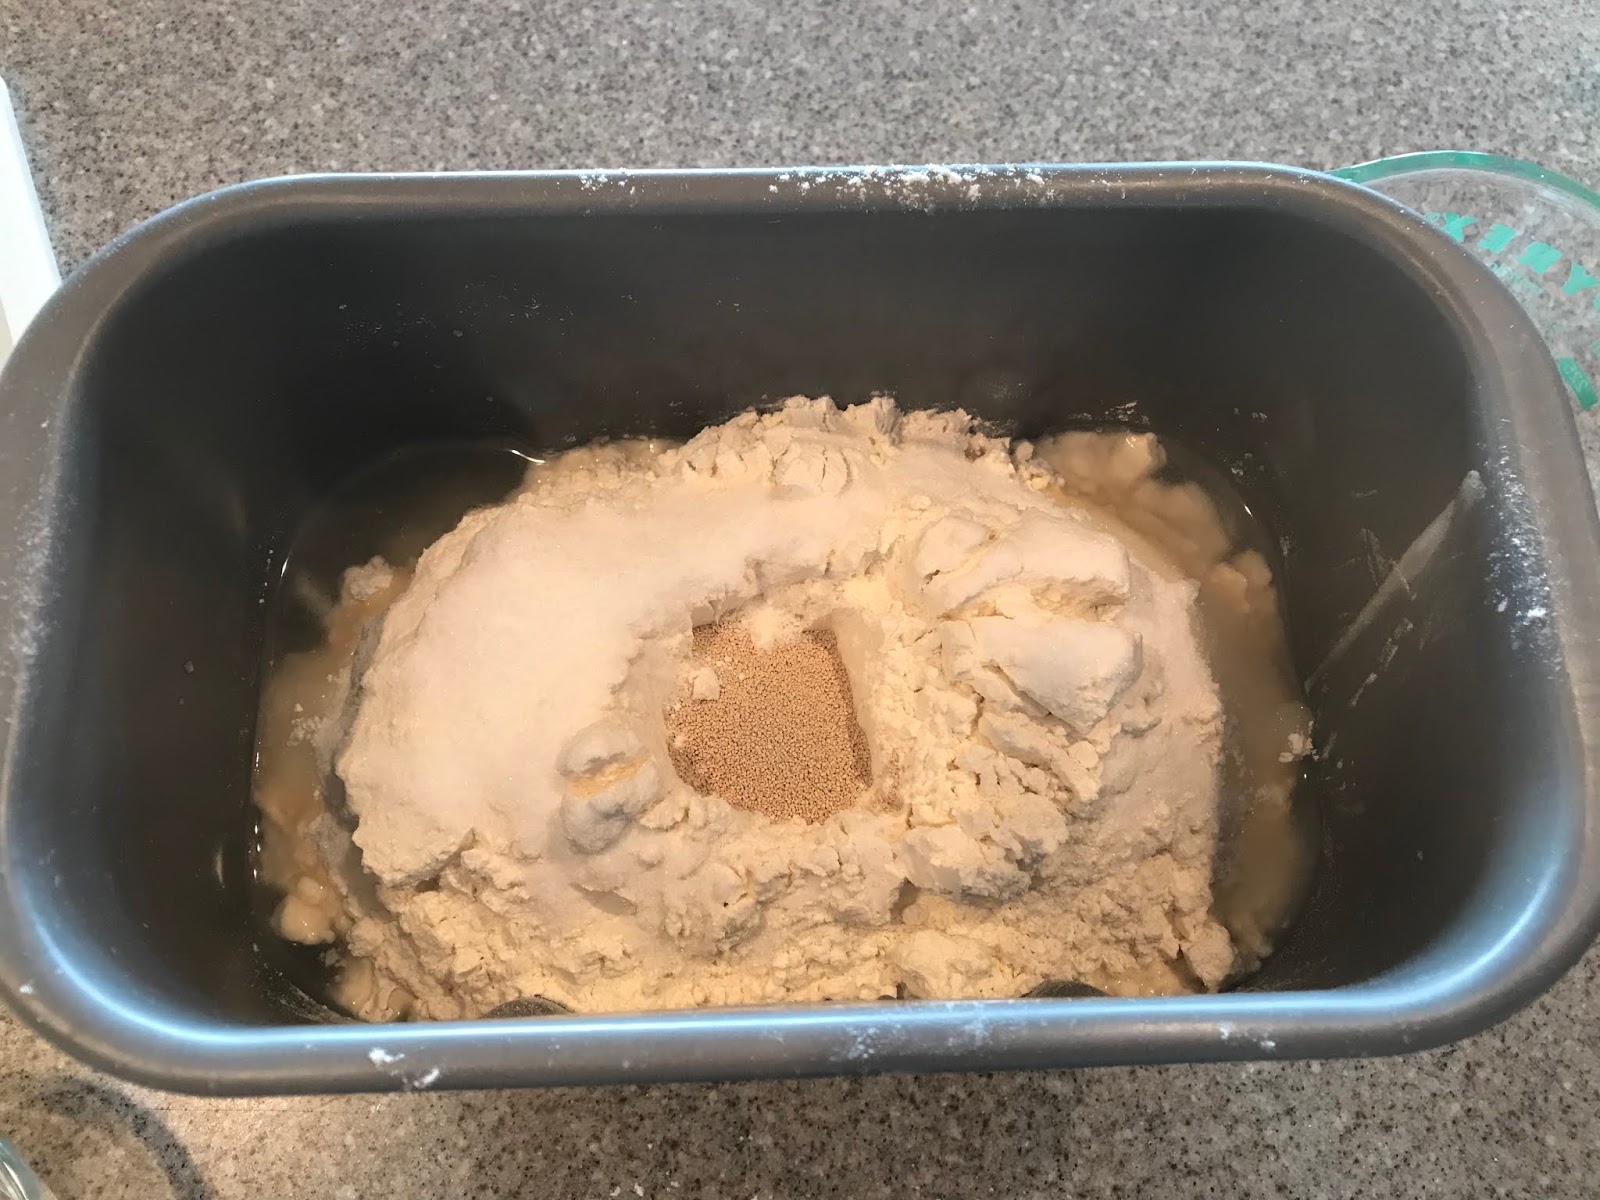
Layer in order in the bread machine:

1/2 cup + 2 tablespoons water
3 large eggs
1/4 cup butter (1/2 stick), cut into pieces
3 tbls sugar
1 tsp salt
3 1/2 cups bread flour
4 1/2 tsp active yeast (2 packets)

Layer ingredients in order in the bread machine
Remove dough after the course in completed (mine takes 1 hr and 50 minutes) onto a lightly floured surface and cut into 4 equal parts.  I also have a scale to ensure each is the same size.  Roll the first piece of dough into a 10 inch circle, using a cake pan to as a guide to trim the edges.  Place on a baking sheet covered with parchment paper.  Spread 1/4 cup filling onto the dough leaving a 1/2 inch bare border around the edge.

Do the same with the next two quarters of dough.  Don't spread anything on the top layer of dough.  Take a 3 inch cookie cutter or small jelly jar and make an impression in the center of the dough.  Then make 16 cuts with a sharp knife around the edge of the circle impression.  It may help to chill the dough for 15 minutes before cutting.
Stretch and twist twice
Tuck the ends under


Lift two wedges of dough at a time, give them a slight tug and then twist them away from each other, twice and then tuck the ends under. Continue the same technique all the way around.  Cover and let rise 1 hour.  Brush with 1 egg mixed with 1 tablespoon of cream and bake in a 350 degree oven for
35 minutes. Cool on a wire rack.

Be creative with your filling but remember not to spread too much between layers.
Ham & Cheese version